Search Manual
Band-in-a-Box® 2018 for Windows® User's Guide
Chapter 15: Reference
Band-in-a-Box Menu Descriptions
This chapter gives line-by-line descriptions for all Band-in-a-Box menus.
File Menu
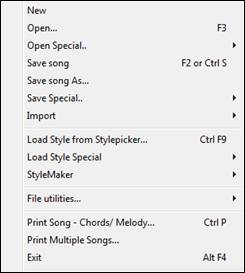
New is used to blank the Chord Sheet and start a new song.
Open shows and opens all available file types (MGU, WAV, WMA, MP3, MID, KAR, CDG, and CDA). And it remembers your preference, so you can restrict it to a certain file type.
Open Special opens a submenu with more options for opening songs.
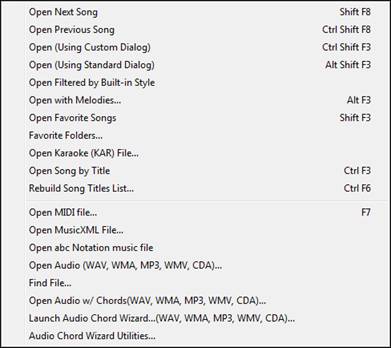
Open Next Song and Open Previous Song will open the next/previous song in alphabetical order. If the song loaded has a file name of “Paul,” choosing load-next-file will find the next file in alphabetical order after Paul, maybe it would be “Peter.” Shift+F8 and Ctrl+Shift+F8 are the hot keys for this.
Open (Using Custom Dialog) uses the custom dialog that allows long-file-names, font selection, and even remembers its settings (unlike the standard Windows® dialogs).
Open (Using Standard Dialog) uses the standard Windows® dialog.
Open Filtered by Style loads only song in current style.
Open with Melodies lists only song files that have melodies (*.mg?).
Open Favorite Songs opens the dialog that shows the last 150 songs played.
Favorite Folders… opens a list of recently used folders for quick access.
Open Karaoke (KAR) File opens Karaoke files directly in Band-in-a-Box, displaying the lyrics and chord symbols for the song.
Open Song by Title allows selection of songs by displaying the full title of the song (not 8-character file name). A search function allows you to search the title list for a word or phrase to quickly find a title. For example, type in “Oldfolks” and the search will find the song title “Old Folks at Home,” as well as any other songs with “Oldfolks” in the title.
Rebuild Song Titles List updates the song list for the current folder without the need to open the SongPicker.
Open MIDI file loads a MIDI file into Band-in-a-Box and the MIDI file will play with the chords intelligently interpreted on-screen. MIDI files read in Section Markers and show them as part markers.
Open MusicXML File imports a MusicXML file from your notation programs such as Finale, Sibelius, and Guitar Pro to Band-in-a-Box.
Open ABC Notation Music File imports an ABC notation file.
Open Audio (WAV, WMA, MP3, WMV, CDA) will open an audio file in WAV, MP3, Windows® Media Player (WMA, WMV) or CD Audio (CDA) format. Play back at 1/2, 1/4, or 1/8 speed for transcribing or analyzing.
Find File finds a Band-in-a-Box song (or any file that Band-in-a-Box can open), including filtering by words found in the file name or any text in the file.
Open Audio w/Chords (WAV, WMA, MP3, WMV, CDA) command will open a WAV, WMA, MP3, WMV, or CD Audio file and also figure out the chords and bar lines.
Launch Audio Chord Wizard… (WAV, WMA, MP3, WMV, CDA) will open the Audio Chord Wizard to analyze chords in an existing Band-in-a-Box song (that has a WAV file on the audio track).
Audio Chord Wizard Utilities opens a dialog with handy options to
- Make/Remove tempo map in Band-in-a-Box.
- Remove audio file from song.
- Auto-set Key signature, with button present in the Audio Chord Wizard.
- Enable/disable the Band-in-a-Box style.
Save song saves current song under original title.
Save song as... is to save songs (*.?G?).
Save Special opens a submenu with more options for saving songs.
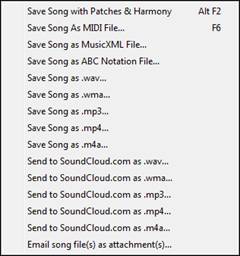
Save Song with Patches & Harmony
All settings are normally saved with Band-in-a-Box files. If you would like to save certain patches with a song, then type in the number of the patch (instrument) that you would like. Leave the other instruments at zero (0) for No Patch Change. Remember that - as with all other Band-in-a-Box functions - you use the General MIDI number for the instrument, regardless of the synth you are using. You can also freeze selected tracks in this dialog.
Save Song as MIDI File saves the song as a Standard MIDI file. You can save in Type 1 (multi-tracks) or Type 0 (single track) files. Karaoke MIDI files are also supported.
Save Song as MusicXML File
Band-in-a-Box supports MusicXML so you can easily export your Band-in-a-Box songs into notation programs such as Finale, Sibelius, and Guitar Pro, while still retaining the chords from the Band-in-a-Box song.
Save Song as ABC Notation File allows you to save the song as an ABC notation file. ABC notation is the simple text-based notation system used by musicians worldwide to store chords, melody, and lyrics of songs. You can find out more information about the songs and ABC notation at abcnotation.com.
Save Song as wav/wma/mp3/mp4/m4a renders the song in the audio format you choose and saves it to the specified location.
Send Song to SoundCloud.com as wav/wma/mp3/mp4/m4a uploads the song to your SoundCloud.com account in the file format you specify.
Email song file(s) as attachment(s) allows you to email a song (.MGU or .SGU), style (.STY and .STX) or rendered audio file (m4a, wma, wav, mp3) as attachments.
Import opens a submenu with options for importing a file to the current song.
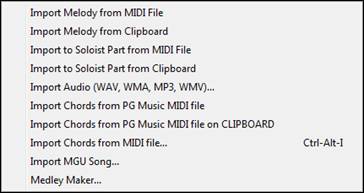
Import Melody from MIDI File allows you to import MIDI data from a file (*.MID) into the Melody track.
Import Melody from Clipboard allows you to import MIDI data that has been pasted into the clipboard (e.g., from a sequencer such as PowerTracks) into the Melody track.
Import Soloist Part from MIDI File allows you to import MIDI data from a file (*.MID) into the Soloist track.
Import Soloist Part from Clipboard allows you to import MIDI data that has been pasted into the clipboard (e.g., from a sequencer such as PowerTracks) into the Soloist track.
Import Audio (WAV, WMA, MP3, WMV) allows you to import an audio file into your Band-in-a-Box song. A Mono or Stereo audio file can be imported to the Audio track, optionally merging or replacing any existing Audio track.
Import Chords from PG Music MIDI file will read in the chord symbols from PG Music MIDI files made by programs like Band-in-a-Box or PowerTracks Pro Audio. Note that it won’t read in the chords from a MIDI file that doesn’t have special chord symbols typed in to it, i.e., it doesn’t interpret chords. If you want to interpret chords from any MIDI file, use the File | Import | Import Chords from MIDI File option instead.
Import Chords from PG Music MIDI file on CLIPBOARD
Chords from most PG Music programs can be copied to the clipboard and imported with this command.
Import Chords from MIDI File uses the MIDI File Chord Wizard to interpret chords from any MIDI file, and also import tracks to the Melody and Soloist tracks.
Import MGU Song imports part or all of an existing Band-in-a-Box song to your current song, with options to specify source and destination range, type of information to import (chords, melody, lyrics, etc.), and more.
Medley Maker opens the Medley Maker, allowing you automatically make a medley of Band-in-a-Box songs.
Load Style from StylePicker will open the StylePicker window with complete style information.
Load Style Special opens a submenu with options for loading a style.
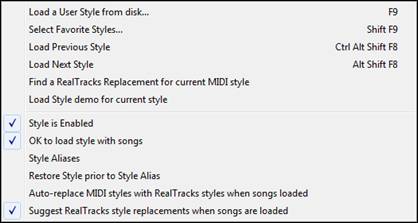
Load a User Style from disk
Styles can be selected and loaded with Long File Name dialogs.
Select Favorite Styles
This opens the Favorite Styles dialog, which contains a list of the most recent 150 styles used. Since these are ordered based upon how often they are used, we call this the “favorite styles” list. Since you can also store user-definable favorite lists, we also refer to them as Set Lists.
Load Previous Style / Load Next Style
This function, like the Load Next Song function, loads in the previous (or next) style in alphabetical order of the file name. These functions are in the File | Load Style Special menu, and accessible with the hot keys Ctrl+Alt+Shift+F8 (or Alt+Shift+F8).
Find a RealTracks Replacement for current MIDI style
This will find the best RealTracks replacement for your current MIDI style and ask if you want to use it.
Load Style demo for current style
This loads the demo song for the currently loaded style. This feature is also available with a click on the name of the style on the main screen. The menu that displays will include the option to “Load Song Demo” for the current style.
Style is Enabled
This item will Enable or Disable the style. When disabled, the name of the style will have an X at the beginning, which indicates a disabled style. The disabled style won’t sound or write any data to the MIDI file. The most common use for disabling a style is when a MIDI file is loaded to the Melody track. Then the style won’t sound and conflict with the full arrangement on the Melody track.
OK to load style with songs
This allows you to keep a style in memory. This way, all subsequent songs that are loaded will not change the style (even if they have a different associated style), so you can easily play songs in the same style. If you’ve found a new favorite style, you can try it out in all kinds of songs without having to reload the style each time.
For example, let’s say we’ve discovered the GARNER style, and want to try it out on many different songs. Select File | Load Style Special | OK to load styles with songsto ensure the item is NOT checked. Then when you load a song the saved style associated with the song doesn’t load and the song will play in GARNER.STY. You can over-ride this style by loading in another style using the [Style] button or the File | Load Style Special menu. The new style loaded will stay in until you choose another one, or until you turn off the forced styles option and load a song that uses a different style.
Style Aliases
You can create an alias so that when Band-in-a-Box looks for a style, it will load its alias instead, so when you have found a new favorite style just change the alias and you don’t have to change all of your songs.
Restore Style Prior to Style Alias reverts to the original MIDI style after you have used a RealTracks replacement. It also turns off the style alias feature for the song.
Auto-Replace MIDI styles with RealTracks styles when songs loaded
If you have made a lot of songs using older MIDI styles, and would prefer that they play with RealTracks, you can now do this easily by selecting the menu option File | Load Style Special | Auto-Replace MIDI styles with RealTracks styles when songs loaded. Then, if you have the needed RealTracks installed, your MIDI style will be intelligently replaced with a RealTracks style. There is also a manual option to do this on as-needed basis, disable the feature for a certain song, or to reverse it if you prefer the MIDI style.
Suggest RealTracks style replacements when songs are loaded
This feature is the manual option for Auto-Replace MIDI styles. It suggests RealTracks style replacements but doesn’t automatically load them. That is done manually from the RealTracks toolbar button menu. It is disabled when “Auto-Replace” is checked.
StyleMaker opens a submenu with options for making and editing styles.

New - Make A New Style
This function allows you to begin to create a new style, using the StyleMaker feature. See online Tutorial #6: StyleMaker - Making a New Style.
Edit a Style
This allows you to edit an existing style (*.STY) from disk. The resulting style can then be saved with the same name or a different name. This function uses the StyleMaker. See online Tutorial #5: StyleMaker – Editing Styles.
Edit Current Style
This allows you to quickly get into the StyleMaker to edit the current style. The current style is the style that is displayed in the Style Box on the main screen. Usually, you would use Ctrl+Shift+F9 to do this quickly. See online Tutorial #5: StyleMaker – Editing Styles.
Save Current Song (except muted instruments) as a Style
Saves the style that is in use to the C:\bb\Styles folder with the parts that are currently selected. If, for example, a MIDI style has had RealTracks added, the RealTracks will be saved with the style and the style name will get an = sign prefix. So, if you were to add an acoustic bass RealTracks to the ZZJAZZ style and save it with this feature, the name would change to =ZZJAZZ.STY. It also saves MIDI SuperTracks and Hi-Q instruments (or other TGS files), and automatically calculates dB offsets based on volume, taking existing offsets into account.
Press the[Rebuild] button in the StylePicker and the new style name will be added to the list of Other Styles.
Make a Hybrid Style
The “Hybrid Styles” feature allows you to play and create a style that has instruments from up to five different styles! You can, for example, play a song with a Reggae bass, Rock drums, Salsa piano, or any combination of up to five styles that you want.
Style Wizard (Auto-Create Style from MIDI file)
This launches the Style Creation Wizard, which automatically converts a MIDI file (.MID) to a Band-in-a-Box Style (.STY). Simply open a MIDI file, select your options, and press “Save-As Style.”
File Utilities opens a sub-directory of file utilities.
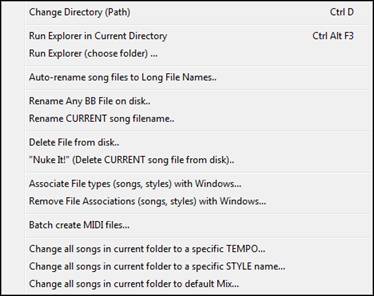
Change Directory (Path) opens the Browse Folder window where a new directory can be selected.
Run Explorer in Current Directory launches Explorer. Pressing Ctrl+Alt+F3 is the usual way to get to this item and will quickly open Explorer. Once Explorer is open, you could double-click on a song or style to load it in. (Assuming that there is a file association for Band-in-a-Box songs and styles made in Explorer.)
Run Explorer (choose folder) opens a Browse for Folder dialog where you can choose a folder.
Auto-rename song files to Long File Names will rename all song files in the current directory to long file names, using the song title as the name.
Rename Any File on disk… or Rename CURRENT song filename allows you to rename files.
Delete File from disk deletes a song file without exiting the program
“Nuke It!” (Delete CURRENT song file from list) deletes the current song.
Associate File types (songs, styles) with Windows… / Remove File Associations (songs, styles) with Windows… will associate (or remove associations for) the file types for Band-in-a-Box songs and styles in Explorer. Once set, this means that you can double-click on a song or style in Explorer and Band-in-a-Box will open with that song or style.
Batch create MIDI files convert an entire folder of BB songs to MIDI files. You can choose the file names to be based either on the original file name or song title name. This feature is also accessed with the [Batch mode…] button in the MIDI file dialog.
Change all songs in current folder to a specific TEMPO will set all the songs in the folder to the tempo you enter, but it is NOT UNDOABLE. (Tempos can be reset individually.)
Change all songs in current folder to a specific STYLE name is also NOT UNDOABLE.
Change all song in current folder to default Mix applies the default mix as set in the Combo right-click context menu. Not undoable.
Print Song - Chords/Melody opens the Print Options dialog.
Print Multiple Songs… prints all songs, or just selected songs, in a song directory.
Exit to exit completely from the Band-in-a-Box program.
The last five files opened are listed at the bottom of the menu, numbered 0 through 4.
Edit Menu
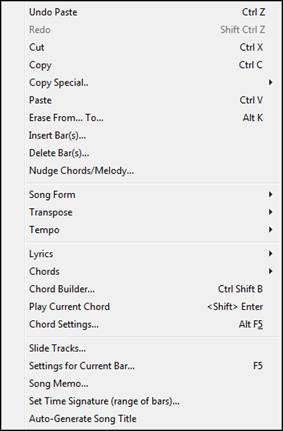
Undo and Redo allow you to undo or redo most operations.
Cut functions like a delete command to remove bars from a song.
Copy is to copy chords to a clipboard. Copying a section of chords can be done in the same manner as copying text in a Windows® word processor. To select the region to copy, place the mouse cursor at the bar to begin the selection. Then, holding down the left mouse button, drag the mouse over the region. As you do this you will see that the region will be inverted (i.e. looks dark). When you have selected the desired region of chords to copy, release the mouse button. Copy the selected region to the clipboard by using the keystrokes Ctrl+C or selecting the Edit | Copy menu item.
Copy Special opens a submenu with more options for copying.

Copy From…To… / Copy Rests
One of the best ways to copy chords is the Copy From… To… command, or pressing Alt+C, which launches the Copy Chords and/or melody dialog. The Copy Rest command will similarly bring up the Copy Rests dialog to allow copying of rests. These dialogs allow you to specify the number of bars to copy, the location to copy to, and the option to copy the Chords, Melody, Soloist, and/or Lyrics.
Copy/Move Tracks opens the Track-to-Track Copy/Move/Delete dialog, which allows copying from one track to another.
Paste
Assuming you have already copied some chords to the clipboard, you are then ready to paste the copied chords into another part of your Chord Sheet. Move the highlight cell to the bar to begin the paste of chords. Copy the chords at the highlighted bar by using the keystrokes Ctrl+V or selecting the Edit | Paste menu item.
Erase From… To… launches the Erase Chords and/or melody dialog, which allows you to specify the number of bars to erase and option to erase the Chords, Melody, Soloist, and/or Lyrics.
Insert Bar(s) inserts a certain number of bars into the Chord Sheet.
Delete Bar(s) removes a certain number of bars from the Chord Sheet.
Nudge Chords/Melody feature allows moving a range of chords by any number of bars and beats.
Song Form opens a submenu with options for a song form.
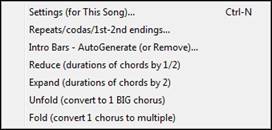
Settings (for This Song)
The Song Settings dialog can also be accessed by pressing the [Song Settings] button on the main screen. These settings are fully explained in the Making Songs chapter.
Repeats/codas/1st-2nd endings
You can add repeats and endings so that the Lead Sheet window will display and print using 1st /2nd endings.
Intro Bars - Auto Generate (or Remove)
This command will launch the Generate Intro dialog where you can specify the characteristics of the intro you wish to generate. For more information on this feature please refer to the Automatic Intro section.
Reduce (durations of chords by 1/2) cuts chord durations by 50% (e.g., 4beats>>2beats; 2beats>>1beat).
Expand (durations of chords by 2) doubles the durations of chords (e.g., 1beat>>2beats; 2beats>>4beats).
Unfold (convert to 1 BIG chorus)
Choose this command to unfold a multi-chorus song into one BIG chorus. When selected, Band-in-a-Box will display all choruses and verses of a song without loops or repeats. It is useful, for instance, when you have a song with 3 choruses and want to convert it to a single large chorus, or to customize a song with the “Edit Settings for Current Bar” feature to change meter, tempo, patches, styles, and/or harmonies and generate a MIDI file for export.
![]() becomes...
becomes... ![]()
Fold (convert 1 chorus to multiple) converts a song with a single big chorus to multiple smaller choruses based on the information you enter in the Fold Song dialog (chorus begins, chorus ends, tag etc.).
If you have imported a MIDI file, you might have a file that is 96 bars long, but really consists of 3 choruses of 32 bars each. You can convert this to a 32-bar song by using the Edit | Fold song option, including inserting tag endings, and 2-bar endings.
![]() becomes
becomes ![]()
Transpose opens a submenu with both manual and automated options for transposing the complete song or selected parts of the song.

Transpose From ... To ... launches the Transpose dialog for transposing a particular section of the song. The bar values can be typed in manually or you can transpose a portion of a song by highlighting the region you wish to have transposed, selecting this menu item, and typing in the new key you wish to transpose to.
Transpose DOWN 1 semitone or Transpose UP 1 semitone transposes the entire song. This can be done while the song is playing. Band-in-a-Box will pause briefly, and then resume playing in the new key at the same place in the song.
Transpose # of semitones opens a dialog where you can type in the number of semitones to transpose the song.
Tempo opens a submenu with options for setting the song tempo.
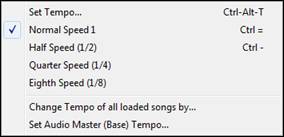
- When a new song is started the tempo is set based on Style. This is the tempo that is embedded in the style file. It can be reset to any tempo.
- You can quickly enter a specific tempo for a song with the Set Tempo… command (hot key is Ctrl+Alt+T), or by clicking on the tempo. A dialog opens up where you can type in a tempo.
- You can quickly change to different speeds with the menu commands or hot keys. For example, choosing Half Speed (or the hot keys Ctrl -) will change the playback speed to half, and Normal Speed (Ctrl =) will revert to normal speed.
- Load an audio file and use the tempo feature to play it at reduced speed without changing the pitch, a big help for analyzing and transcribing songs.
- For practicing tunes, it can be useful to play them at slower or faster tempos. You can enter an amount to change tempos for each song that is loaded.
Change Tempo of all loaded songs by…
For practicing tunes, it can be useful to play them at slower or faster tempos. You can enter an amount to change tempos for each song that is loaded.
Set Audio Master (Base) Tempo is used to ensure that tempo stretches are based on correct master tempo.
Lyrics opens a submenu with options for showing or editing lyrics.
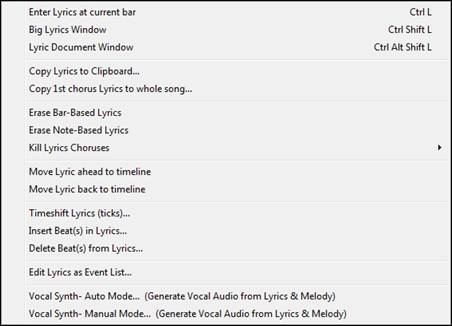
Enter Lyrics at current bar opens the Lyric entry box at the current location of the timeline or highlight cell.
Big Lyrics Window opens the Big Lyrics window for viewing lyrics and, optionally, chord symbols.
Lyric Document Window displays a full screen of formatted lyrics. Easily copy and paste lyrics to and from your favorite word processor. The lyrics will then display in the Big Lyrics window.
Copy Lyrics to Clipboard
This function allows you to copy a song’s lyrics (and/or the chords) to the standard Windows® clipboard. By pasting this data into a word processor, you can print out the lyrics in the font of your choice. The dialog has options to allow copying of note-based and/or line-based lyrics. With either option you can choose to include the chord symbols, have double or single line spacing, and make margin settings.
Copy 1st chorus Lyrics to whole song copies the note-based lyrics for the first chorus to the rest of the song.
Erase Bar-Based Lyrics erases bar-based lyrics.
Erase Note-Based Lyrics erases only the note-based lyrics.
Kill Lyrics Choruses
Select from a list box to kill lyrics in the selected chorus.
Move Lyric ahead to time line / Move Lyric back to time line
If you have a note-based lyric that you want to time shift ahead or back, you can click on the time line at the destination that you want, and then choose this item. You can also shift lyric times using the Lyric Event list.
Timeshift Lyrics (ticks) / Insert Beat(s) in Lyrics / Delete Beat(s) from Lyrics
These are functions that apply to the entire lyric track. They are useful when you’re inserting bars or beats into the song and need to move the lyrics around to keep them in sync.
Edit Lyrics as Event List opens the Edit Lyrics dialog with Edit, Insert, Append, and Delete functions.
Vocal Synth - Auto Mode (Generate Vocal Audio from Lyrics & Melody)
Your Melody or Soloist track with lyrics can be rendered to a vocal audio track by sending it to the 3rd party vocal synthesizer Sinsy. Choose the language, Japanese or English, and one of the female or male vocalists. You can adjust the gender of the voice in a range from -0.8 to +0.8. Higher values are more masculine. If your track does not include lyrics you can enter a syllable to use for notes with no lyrics.
With the “Auto” command your song will be sent automatically to the song server and returned as an audio file on the Audio track. This may take a few minutes. When the vocal synth has been generated, the Import Audio File dialog opens. Press [OK] to import it to the Audio track.
Vocal Synth - Manual Mode (Generate Vocal Audio from Lyrics & Melody)
With this command, Band-in-a-Box will generate a file named Sound.XML and save it in C:\bb\Data\SRequest. Use your browser to navigate to www.sinsy.jp and upload the xml file. A file named sound.wav will be returned and loaded into the Audio track of your song.
Chords opens a submenu with options for editing chords.
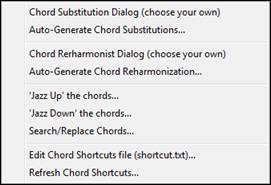
Chord Substitution Dialog (choose your own)
This allows you to see a list of possible chord substitutions for the current chord progression. You can also access it from a right mouse click on the Chord Sheet, and by pressing the Chord Substitution button.
Auto-Generate Chord Substitutions
This will automatically pick chord substitutions for all or part of the song.
Chord Reharmonist Dialog (choose your own) shows you the current bar in the song with a list of suggested chord progressions for the current melody, based on the melody and genre that you choose.
Auto-Generate Chord Reharmonization generates an entirely new chord progression for a complete song or a portion of a song. Selecting this menu option opens the Reharmonist dialog.
‘Jazz Up’ The chords
This menu command will “Jazz Up” the chords by changing chords like C and Cmaj to 7th and 6th chords. Song embellishment will be turned on for the song. Select the type of 7ths from the list box, and then click on the [OK – Jazz UP] button.
’Jazz Down’ The chords
This will “Jazz Down” the chords by changing chords with 7ths (e.g. C7) to triads (e.g. C) and 9ths and 13ths to 7th chords. Song embellishment is turned off. Press [OK – Jazz Down] to proceed.
Search/Replace Chords will search and replace chords, including support for asterisks (*) as wildcards.
Edit Chord Shortcuts file (shortcut.txt) / Refresh Chord Shortcuts
If you have found a chord that Band-in-a-Box doesn’t recognize, you can add your own shortcuts in a text file that you make yourself called C:\bb\shortcut.txt and Band-in-a-Box will allow you to type in that chord in the future. Click on this menu command to open or create your own chord shortcuts file. Make sure to save the file after editing. Changes won’t take effect until you choose Edit | Chords | Refresh Chord Shortcuts…
The text file C:\bb\Data\shortcut.txt allows you to add new chord shortcuts. If you find a chord that Band-in-a-Box won’t accept, like Csus2 when it expects C2 instead, you can enter this on a single line (without the quotes) “Csus2@C2.” Then Band-in-a-Box will enter the chord C2 whenever you type in Csus 2. You can also use it for shortcuts. For example, if you entered j@maj7 Band-in-a-Box would let you type Cj for CMaj7. See the file C:\bb\Data\pgshortc.txt for examples of shortcuts.
Chord Builder allows you to build up chords using mouse clicks.
Play Current Chord
This function plays the current chord on the Chord Sheet. It is most commonly accessed by pressing Shift+Enter on the Chord Sheet.
Chord Settings
This launches the Chord Options dialog, where you can put in rests and pushes. You can launch the Preview, Chord Builder, or Chord-Substitution Functions from this window.
Slide Tracks
This allows you to move any of the Bass, Drums, Piano, Guitar, Strings or Melody track ahead or behind by a certain amount. You could, for example, slide the Bass track so it plays a little ahead of the rest of the band. This has the effect of making the bass player “drive the band,” and is useful in Jazz styles to make the music sound more exciting.
Settings for Current Bar
This command opens the Edit Settings for Current Bar dialog where you can change meter, tempo, volume, patches, styles, RealDrums styles, and/or harmonies at the current bar. This dialog is covered in detail elsewhere in this manual and in the online Help. You can specify the changes to happen for every chorus and/or a specific chorus.
Song Memo
A song memo of up to 2000 characters may be added.
Set Time Signature (range of bars)
In Edit | Set Time Signature (range of bars) you can assign a specific time signature at any bar and apply it to a range of bars, as often as you want. For example, to have one 5/4 bar, bar 13, select this menu item, and toggle the 5/4 button. Then, type in the bar beginning (13) and number of bars (1) in the space provided.
Auto-Generate Song Title allows you to generate a title for a song. There is also a button on the main screen for this.
Options Menu
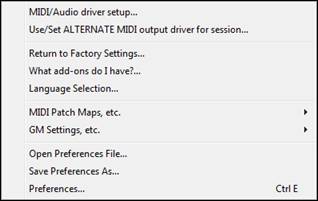
MIDI/Audio driver setup
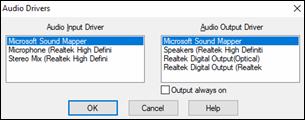
Select MIDI Input and MIDI Output drivers and choose a Synthesizer / Sound Card patch map. Select the [MIDI Output Driver Wizard] button for help with your selection. Click on the [Audio Settings] button if you need to set up audio drivers, such as ASIO drivers. This topic is discussed in detail in the MIDI and Audio Setup instructions.
Use/Set ALTERNATE MIDI output driver for session
The Option menu item Use/Set Alternate MIDI Driver for session, allows you to set a temporary MIDI Driver for a session, useful when your main MIDI Driver is “in-use” by another application.
Return to Factory Settings
Choosing this command will reset all settings to the default at the time of shipping. Return to Factory Settings also offers to nuke the drum kit and MIDI Driver choice, making the return to factory settings complete.
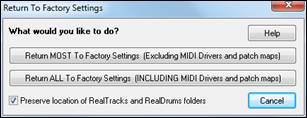 |
If you choose MOST settings, the patch map and drum kit will be left intact, and not reset. |
What add-ons do I have?
An intelligent dialog, also accessible from the Help menu that will search your directory to tell you which add-ons you have and which you don’t.
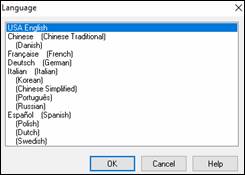
Language Selection
This item in the Option menu allows you to change language from English to another language for display. If there are other languages supported by your version of Band-in-a-Box, then they will be displayed in this dialog. International language versions are available for download from www.band-in-a-box.com. |
|
MIDI Patch Maps, etc.
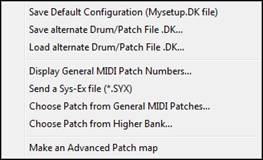
Save Default Configuration (Mysetup.DK file)
This will rewrite the Band-in-a-Box configuration file mysetup.dk with your current settings. This file contains:
- MIDI Channels/Patches/Volumes/Reverb/Chorus/Bank<
- Patch Map
- Favorite Patches, Favorite Combos settings
- Drum Kit
Save / Load alternate Drum/Patch File .DK
Allows you to save different custom drum kits or load preset or custom kits.
Display General MIDI Patch Numbers
This opens the General MIDI Patch List for reference.
Send a SysEx file (*.SYX) is a command that sends SysEx information to your MIDI device.
Whether you want to load different patches (or ones you have “tweaked” with a patch editor/librarian such as the SC-Pro Editor/Librarian) into your MIDI device or whether you have a synth that requires a SysEx to set it to a certain mode, you can easily send SysEx files with a configurable delay (the default is 100 ms).
If you would like to send a SysEx file to your MIDI device automatically at the start of each session, you need to make a file called STARTUP.SYX, and put it in the C:\bb directory. Then, each time the program is started, it will send the appropriate SysEx commands contained in this file to your MIDI device.
If you need to send a SysEx file at any time during a session, choose the Options | MIDI Patch Maps, etc. | Send a Sys-Ex File (*.SYX)option. This launches a window from which you can choose a file to send. Since some MIDI devices require a delay time between parts of a SysEx message, there is a default delay value of 100 ms between each part of the message.
If you need to change the default delay, go to the Options | MIDI Patch Maps, etc. | Make an Advanced Patch map menu item and enter the Sys-Ex Delay to a value in milliseconds (ms). If it is set to 0 ms, the program will revert to the default of 100ms. The smallest delay setting is 1(ms).
SysEx files are files that can be made with programs such as PG Music’s PowerTracks Pro Audio or SC-Pro Editor/Librarian. They begin with a F0(hex) byte and end with a F7 byte.
Examples where you might want to use a SysEx file with Band-in-a-Box are:
- Employing a custom setting or patch you have made with the SC-Pro Editor /Librarian.
- Sending a General MIDI mode ON message automatically when Band-in-a-Box boots up.
Choose Patch from General MIDI Patches allows you to select a patch for the currently selected instrument from an organized list of GM patches.
Choose Patch from Higher Bank allows you to select a patch using the advanced search and higher bank/patch support capabilities.
Patch maps contain information for mapping the patches and drum notes to your synthesizer as well as Velocity offset, Octave offset, bank Controller 0 setting, bank Controller 32 setting, etc. There are also advanced options like sending a SysEx file by loading the .DK file.
Edit these settings in the Options | MIDI Patch Maps, etc. submenu by choosing Make an Advanced Patch map.
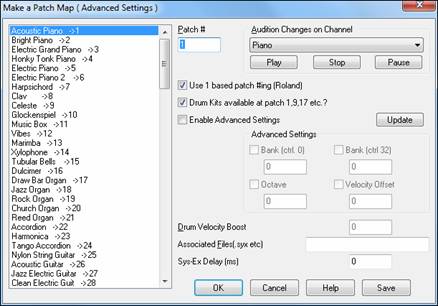
These options are useful either if you have a newer synthesizer that supports bank changes and has nice patches in higher banks or if you have an older synth that requires custom mapping of sounds. To access these features, enable the “Enable Advanced Settings” option. Then, type in the values you would like to change. Say, for example, you have some great string sounds on your synth on Bank 4, Controller 32. With this feature you can save them as part of your Band-in-a-Box setup by clicking the [Save] button. This will append your MYSETUP.DK file to include all of the patches you like to use, regardless of where they are on your synth.
Some basic soundcards don’t have volume responsive drums. The result of this limitation can be rather unpleasant, since the drums might be too loud and there is no way of lowering the volume. Band-in-a-Box overcomes this so that you can boost or reduce the velocity of the drums on virtually any sound source.
To adjust the drum velocity, access Options | MIDI Patch Maps, etc. | Make an Advanced Patch map and tick the option to “Enable Advanced Settings.” Then, enter a Number from -127 (quietest) to +127 (loudest) in the “Drum Velocity Boost” box.
Whether you want to load different patches (or ones you have “tweaked” with a patch editor/librarian such as the SC-Pro Editor/Librarian) into your MIDI device or whether you have a synth that requires a SysEx to set it to a certain mode, you can easily send SysEx files with a configurable delay (the default is 100 ms).
If you would like to send a SysEx file to your MIDI device automatically at the start of each session, you need to make a file called STARTUP.SYX, and put it in the C:\bb directory. Then, each time the program is started, it will send the appropriate SysEx commands contained in this file to your MIDI device.
If you need to send a SysEx file at any time during a session, choose the Options | MIDI Patch Maps, etc. | Send a Sys-Ex File (*.SYX) option.
This launches a window from which you can choose a file to send. Since some MIDI devices require a delay time between parts of a SysEx message, there is a default delay value of 100 ms between each part of the message.
If you need to change the default delay, go to the Options | MIDI Patch Maps, etc. | Make an Advanced Patch map menu item and enter the Sys-Ex Delay to a value in milliseconds (ms). If it is set to 0 ms, the program will revert to the default of 100ms. The smallest delay setting is 1(ms).
GM Settings, etc.
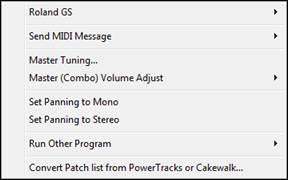
Roland GS has settings for Roland GS keyboards and sound modules.

Reset Roland GS (Quick) and Reset GS (all ID’s) reset the module to factory settings.
Set Reverb Type or Set Chorus Type (GS Module): Roland GS instruments allow different type of reverb and chorus settings. These settings boxes allow you to select them.
Assign Part/Channel etc. for GS Module: The GS Part settings are for GS compatible synthesizers only. These synthesizers have 16 parts. The default is for part 1 to be channel 1, part 2 channel 2 etc., but you can change a part to another channel. This allows you to use the same channel for 2 parts, so that you hear a layer of 2 instruments playing the same part.
Send MIDI Message
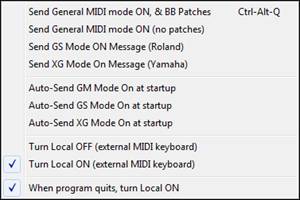
The GM functions work on MIDI sound devices that support the GM (General MIDI) standard, which includes most newer MIDI Keyboards and sound cards.
The GS functions work on instruments that support the Roland GS specification. This includes the Roland Sound Canvas, SCC1, and JV-30.
The XG functions work on instruments that support the Yamaha XG specification.
Send General MIDI mode ON, & BB Patches sends a General MIDI mode ON message to the external MIDI device and the sends the startup Band-in-a-Box patch changes.
Send General MIDI mode ON (no patches) sets the external module to General MIDI mode. This command will ensure that the module is ready to accept GM-specific MIDI data such as Bank, Controller, and Patch information.
Send GS Mode On Message (Roland) / Send XG Mode On Message (Yamaha)
Since the inception of the GM (General MIDI) standard, there have been two major subsets/extensions of this standard; GS (Roland) and XG (Yamaha). Therefore, in addition to the GM Mode-on menu item feature there are additional commands to send a GS mode ON or a XG mode ON message at any time by accessing the GM menu.
Auto-Send GM Mode On at startup sends a “General MIDI mode on” message when the program boots up.
Auto-Send GS Mode On at startup sends a Roland GS system on message when the Band-in-a-Box program boots up.
Auto-Send XG Mode On at startup sends a Yamaha XG system on message when the Band-in-a-Box program boots up.
Turn Local OFF / ON (external MIDI keyboard)
“Local” refers to music playing on an external MIDI keyboard. If set to “Off,” Band-in-a-Box will play the keyboard via the THRU part. If set to “On,” both Band-in-a-Box and the keyboard might be playing the same Thru part.
When program quits, turn Local ON automatically turns the external MIDI keyboard back on at the end of the Band-in-a-Box session.
Master Tuning allows you to master tune your sound card or sound module. This is useful if you’re playing along with an instrument or recording that can’t easily be re-tuned like an acoustic piano. A setting of 0 is the default A = 440.
Master (Combo) Volume Adjust submenu
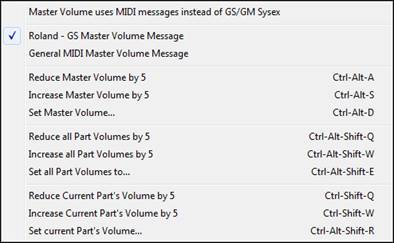
Master Volume uses MIDI messages instead of GS/GM SysEx should be set by all users except if you have a Roland GS synth, Roland Sound Canvas, or Roland VSC. If set, the Combo settings will allow Master Volume and other MIDI settings to work. This submenu allows you to set whether to use Roland - GS or General MIDI for Master Volume messages. Unless you have a Roland, you should select General MIDI.
If you want to “turn it all up or down,” this can be done quickly with menu commands or hot keys to set the Master Volume. There are also hot keys that control the overall volume by reducing (or increasing) volumes on all parts by 5 to simulate a Master Volume effect (especially useful for sound cards that don’t support Master Volume changes). These items also have hot keys as listed on the menu (Ctrl+Alt+Shift Q, W, and E). Commands and hot keys are also provided to change the volume of the current part only.
Set Panning to MONO sets the panning of your Band-in-a-Box parts (Bass, Drums, Piano, etc.) to mono.
Set Panning Mode to Stereo sets the panning of your Band-in-a-Box parts (Bass, Drums, Piano, etc.) to a typical stereo setup, which is saved with the preferences.
Run Other Programs
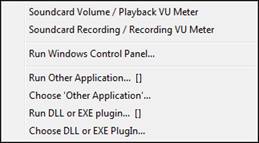
Sound card Volume / Playback VU Meter launches the Windows® Mixer to adjust volumes on your sound card with the Playback panel.
Sound card Recording / Recording VU Meter launches the Windows® Mixer to adjust volumes on your sound card with the Recording panel.
Run Windows Control Panel runs the Windows® Control Panel, which lets you examine MIDI and Audio settings in the Multimedia, Add New Hardware, and System panels.
Run Other Application and Choose ‘Other Application’ allows you to specify and run any other application (mixer application, PowerTracks etc.).
Run DLL or &EXE plugin and Choose DLL or EXE Plugin allows you to run a plug-in that has been made specifically for a PG Music product.
Convert Patch list from PowerTracks or Cakewalk
This will let you convert a PowerTracks Pro Audio .INI file or a Cakewalk .INS file to a Band-in-a-Box .PAT file.
Open Preferences File / Save Preferences As
You can save and load custom preferences files with your current settings saved and restored. For example, you can have a preference that remembers a certain group of songs, notation transpositions, etc.
The Options | Return to Factory Settings menu command saves preferences to disk, so that the settings can be restored at any time.
Preferences
The Preferences dialog allows you to set various settings that are saved in the Band-in-a-Box for Windows® configuration file called intrface.bbw.
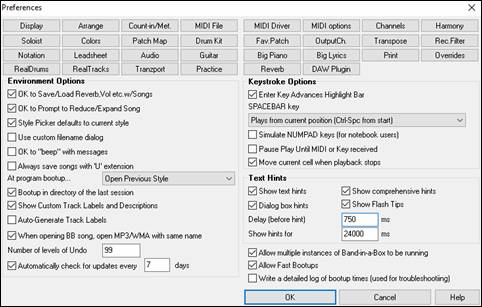
Keystroke Shortcuts - You can open the dialogs with keystrokes by typing the underlined letter shown on the tabs. For example, you can open the “Arrange” Prefs tab by the keystrokes.
- Ctrl+E to open the Preferences dialog, then
- A to open the Arrangement Options dialog.
OK to Save/Load Reverb, Vol etc. w/Songs - Select this checkbox if you wish to embed Reverb, Volume, Pan, Chorus, and Bank information with songs for later recall, or if you wish to enable any such embedded information with songs that are loaded. The last settings that are in effect on the main screen instrument panel when you save the song will be recorded. Individual settings can be enabled/disabled in the File | Save Special | Save Song w/Patches and Harmony menu item.
OK to Prompt to Reduce/Expand Song - If a style is changed with a different feel (16th notes instead of 8th notes), Band-in-a-Box will automatically offer to expand or reduce the duration of the chords and change the tempo to accommodate the new style.
StylePicker defaults to current style - Since the StylePicker can now default to the current style, this option is available. If you want the StylePicker to stay at the style that you left it, de-select this item.
Use custom filename dialog - When selected, the menu command File | Open, or the F3 key will launch the custom Open Fil dialog. This dialog has several advantages over the traditional Windows® dialogs:
- The window is much bigger than the traditional one, allowing more room.
- There is a selectable font size and typeface.
- You can adjust the widths of the various columns.
- The Window remembers your settings.
- There are tabs at the top that allow sorting by name, date etc.
OK to “beep” with messages - Now that people have their sound cards hooked up to big speaker systems, a simple “beep” issued by Windows® when an incorrect key is pressed can seem loud enough to “wake your neighbors.” Setting the “silent beep” option allows Band-in-a-Box to visually flash the window title bar to get your attention, instead of generating an audible “beep.”
Always save songs with “U” extension - Older Band-in-a-Box songs had additional extensions for last letter (1-9, A-O) to indicate style type. Setting this will resave those old songs with a “U” extension, MGU or SGU (if no melody is present).
At program bootup… - When the new session starts, Band-in-a-Box can automatically open the song or style that was used in the last session.
Boot up in directory of the last session - On program boot up, the current directory will get set to the last directory used in the previous session.
Show Custom Track Labels and Descriptions - If this option is enabled, the Track buttons at the top of the main screen and the track labels on the Mixer will display custom track labels and descriptions that you have customized.
Auto-Generate Track Labels - If this option is enabled, the Track buttons at the top of the main screen and the track labels on the Mixer will display auto-generated labels. For example, if the track contains Banjo, then the label will show “Banjo” instead of the default track labels (Bass, Piano, Drums, Guitar, Strings, Melody, and Soloist). Also, the track buttons in various windows (Notation, Lead Sheet, Guitar, Piano, etc.) will display initials of auto-generated labels. For example, [H] will show for a track that plays Harmonica.
When opening BB song, open MP3/WMA file same name - If MySong.MGU is loaded, and a same named audio file (MySong.WMA, MySong.MP3, MySong.WAV, etc.) is present, Band-in-a-Box will open the audio file to the audio track. This allows third parties to make audio files with chords in them, by making a MySong.MGU and MySong.MP3 pair of files, which will load into Band-in-a-Box yet will have the audio compressed to take up little disk space.
Number of levels of Undo for the Edit | Undo command can be as high as 999. The default is 99.
Automatically check for updates every __ days - If this is enabled, the program will automatically check for new updates. This will occur as often as you choose. A setting of 0 days will check every time you run the program.
Enter Key Advances Highlight Bar - The Enter key advances the highlight bar on the Chord Sheet. This speeds up the entry of songs for people who prefer to use the Enter key. When you enter a chord on the chord worksheet, press the Enter key to place your chord in the highlighted cell. The highlighted region will then move automatically to the next cell. The right arrow key can also be used to move the highlight cell.
SPACEBAR Key - There are three options for spacebar operation.
- Enters no chord (deletes current chord)
- Plays from current position (Ctrl + Space from start)
- Plays from start (Ctrl + Space from current pos.
The default setting is to play from current position and stop the song.
Simulate NUMPAD keys (for notebook users) - Notebook users often don’t have a number pad so they can’t use the Band-in-a-Box looping features (Ctrl+NUMPAD 1-6 keys). With this option the regular numbers can be used to trigger the looping feature. For example, pressing Ctrl+2 will start playback of looped choruses.
Pause Play until MIDI or Key received - This allows playback to be started by a MIDI note received at the MIDI In port, or by pressing a key on the computer keyboard. Band-in-a-Box generates its arrangement, and then “stands by” for your start command.
Move current cell when playback stops - If this is enabled, the current cell will move to the last played bar when playback stops.
Text Hints - Choose to enable or disable the fly-by text hints, the comprehensive program hints, and/or the dialog box hints. Set the time delay in ms before the hint pops up, and the length of time it will display.
Allow multiple instances of Band-in-a-Box to be running allows you to have more than one copy of Band-in-a-Box open at a time.
Allow Fast Bootups - Normally, this option should be enabled. This should only be disabled if you are having some problem with bootup.
Write a detailed log of bootup times (used for troubleshooting) - This will be used as a diagnostic tool only. When this option is enabled, you will get a message on bootup, which displays a detailed description of times for bootup.
Preferences Buttons - Most program settings and options can be accessed from the rows of buttons at the top of the Preferences dialog.

Display Options
![]() The [Display] button opens the Display Options dialog, which allows you to customize the display for the Chord Sheet.
The [Display] button opens the Display Options dialog, which allows you to customize the display for the Chord Sheet.
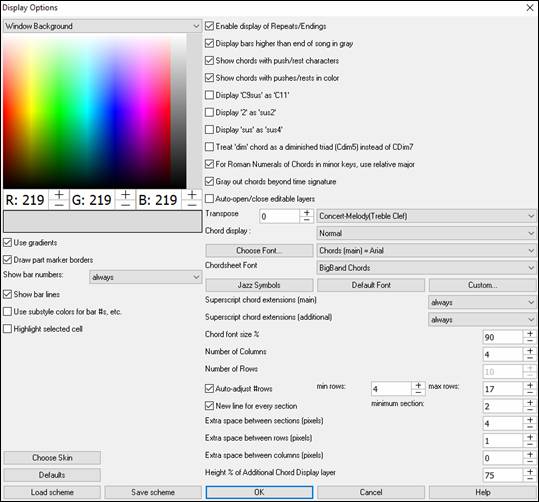
The colors all elements on the Chord Sheet can be customized with the color palette in this dialog.
Use Gradients - This option gives the part markers with a gradient look. This also makes smoother seams between layers.
Draw part marker borders - This option lets you choose whether a border around the part markers is drawn or not.
Show bar numbers - This determines how often bar numbers appear. Choices are: never, always, only at part markers, or only at new rows.
Show bar lines - Check this option if you want to see a bar line to left of bar numbers.
Use substyle colors for bar #s, etc.This option controls the color of bar lines, bar numbers, and section letters. If this is enabled, bars without part markers will use the color of the current style. If this is disabled, everything will be displayed using a single color which is set for “Non-Part Marker (text)” in the color picker.
Highlight selected cell - If this option is selected, the currently selected cell will be highlighted instead of just out-lined. You can change the highlighting color by selecting “Cell highlighting” in the color picker. This feature is useful for JAWS Screen Reader users.
Enable display of Repeats/Endings allows repeats signs and 1st/2nd ending markers to be shown on the Chord Sheet.
Display bars higher than end of song in gray will “gray out” the bars on the Chord Sheet after the end of the song.
Show chords with push/rest characters - The push character is the caret symbol (^). So, a C chord with a push is displayed as ^C. The rest character is a period (.) so a C chord with a rest is displayed as C. (C period). If you prefer to not see these characters displayed, then set this to false. These characters won’t show up on the printout regardless of this setting.
Show chords with pushes/rests in color - If this is enabled, pushes will be displayed in GREEN and rests are displayed in RED. This only applies to the Chord Sheet, not the notation.
Display ‘C9sus’ as ‘C11’ - This option allows display of “9sus” chords as “11” (e.g., Bb11 instead of Bb9sus). This only affects how the chord is displayed, not how it is stored. And you can type either C11 or C9sus to enter the same chord.
Display ‘2’ as ‘sus2’ / Display ‘sus’ as ‘sus4’ - These options will show suspended chords more explicitly. “sus” implies “sus4,” and “2” implies “sus2,” but you might want to see the full extension name.
Treat ‘dim’ chord as a diminished triad (Cdim5) instead of Cdim7 controls if Cdim will represent Cdim5 or Cdim7. When set, Cdim means the diminished triad (Cdim5) and the diminished 7th is entered as Cdim7.
For Roman Numerals of Chords in minor keys, use relative major - For minor keys, base roman numerals on the relative major. For example, in key of Am, Am is either the Im chord or the VIm chord.
Gray out chords beyond time signature - This setting grays out chords that won’t play in the song. For example, if you switch a song of 4/4 time signature to a waltz style, the chords on beat 4 will be grayed out.
Auto-open/close editable layers - If this is enabled, any editable layers (Bar Lyrics and Section Text layers) will automatically open or close when you open a song.
Transpose - This will visually transpose the chord sheet and notation display by a number of semi-tones for concert or non-concert instruments, either by typing in a number or choosing a preset. If a Chord Sheet or Notation window transpose setting is in effect, a yellow hint message opens on boot up as a reminder.
Chord display - This setting allows you to choose a chord display for the main layer.
[Choose font] - Thisbutton allows you to choose a font, style, and size for the selected item in the combo box to the right.
Chord Sheet Font - This allows you to choose a font for the chords on the main layer. If you click on the [Jazz Symbols] button, then “Jazz Chord Symbols” will be selected and you will see shorthand Jazz chord symbols on the Chord Sheet. The [Default font] button selects BigBand Chords. The [Custom] button allows you to choose the size as well.
Superscript chord extensions (main) / Superscript chord extensions (additional) - The superscript feature shows the chord extensions using smaller raised text. This makes the root of the chord more distinguishable, and also helps maximize space on the Chord Sheet. “Superscript chord extensions (main)” is for extensions of the chords on the main layer, and “Superscript chord extensions (additional)” is for extension of the chords on the additional layer.
Number of Columns - You can select the number of columns displayed on the Chord Sheet screen.
Number of Rows - The number of rows displayed on the Chord Sheet screen can be selected manually to best match your screen size and resolution. This only applies if Auto-adjust # rows” is disabled.
Auto-adjust # rows - If this is set, when songs are loaded, the number of rows will change depending on the number of bars in the song, and the number of rows will vary within the supplied range between “min rows” and “max rows.”
New line for every section - When this is set, most part markers will start a new line on the Chord Sheet. This makes the sections more readable. It can be disabled for a song using Edit | Settings (for This Song). The “minimum section” setting is the minimum number of bars that is required for a section to automatically start a new line.
Extra line space between sections (pixels) is the amount of space to add on a new line when there is a part marker.
Extra space between rows (pixels) - This allows you to set a border thickness between rows.
Extra space between columns (pixels) - This allows you to set a border thickness between columns.
Height % of Additional Chord Display layer - This sets the percentage of additional chord display layer. For example, if you want to see Nashville Notation on the additional chord display layer as big as the main chord display below it, set this option to 100%.
[Choose Skin] - This allows you to see the small toolbar buttons in color.
[Load scheme] [Save scheme] - All of the settings and colors can be saved and loaded as a .csc file.
Arrangement Options
![]() The [Arrange] button opens the Arrangement Options dialog
The [Arrange] button opens the Arrangement Options dialog
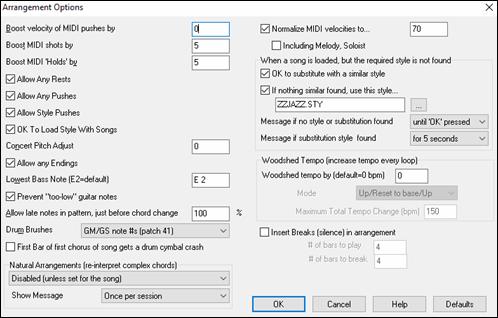
Boost Velocity of pushes by - The pushes in Band-in-a-Box are the chords that get played before the beat. Typically pushes are played a little louder than other patterns. You can leave this setting at 0 or set it to between 0 and 10.
Boost shots by - Shots can be accented with this setting.
Boost ‘Holds’ by - Use this setting to boost the velocity of held chords.
Allow Any Rests - You can disable the rests feature. You might want to do this if you’ve got a song with a lot of rests in it and are then having difficulty recording a melody because you don’t hear the drums providing the beat (due to the drums resting). If so, you can temporarily disable the rests so that you can record and listen to the drums.
Allow Any Pushes - If for some reason you don’t want a style or a song to have pushes, you can set this to no.
Allow Style Pushes - If for some reason you don’t want a style to have pushes, you can set this to no.
OK to Load Style with Songs - This loads the style that is saved with the Band-in-a-Box song. Set it to NO if you don’t want the saved styles to load, perhaps to audition a new style with several different songs.
Concert Pitch Adjust - This is useful for non-concert instruments such as Saxophone or Trumpet. The output is transposed so that you see the music in one key, and it plays in another.
Trumpet players and other Bb instruments should set Concert Pitch Adjust to –2.
Alto Sax and other Eb instruments should set Concert Pitch adjust to +3.
Allow Any Endings - You can disable the endings from all the songs by using this setting.
Lowest Bass Note - Styles will normally play bass notes (down to the low E) if the pattern won’t go below a low E note. This happens with all styles automatically, but there is also an option to set the lowest note that the bass can go real low (so you can get a low C if you want to!).
Prevent “too low” guitar notes - For styles using a guitar patch on the Guitar, Piano, or Strings part this will prevent any note from being lower than the low E on a guitar.
Allow late notes in pattern, just before chord change - Styles will normally play notes near the end of a pattern, before a chord change. Sometimes this makes the style sound “too busy.” If you set this to, say 70%, then 30% of the time, the note at the end of the pattern will play quieter, typically at half the volume.
Drum Brushes - Most GM modules have brushes available on patch 41 on the drums. On some Sound Blasters you need to load a GS sound font for this to occur, and you need to use the Sound Blaster software to do this (AWE Control Panel). On the Yamaha XG, you likely need to send a “GS mode on” message from the GM menu in Band-in-a-Box. But if your module just doesn’t have brushes available, then you can set this option, and the style will remap the notes to different drum instruments that don’t have brushes.
First bar of first chorus of song gets a drum cymbal crash - If selected, the first bar of the song (following the intro) might get a cymbal crash. Usually this is left unselected, since most drummers wouldn’t play a crash cymbal on bar 1 of the song.
Natural Arrangements (re-interpret complex chords) - If you give a pro musician a complicated chord progression with fancy extensions like C7b9b13 or Gm11, the musician may reinterpret these rather than playing them exactly as written. This can achieve a much better sounding arrangement because the musician has freedom to choose from similar chord extensions. You can get Band-in-a-Box to do the same thing with this option for all tracks in all songs. (Note: To set this feature for all tracks in the current song, use the option in the Song Settings dialog. To set this for specific track(s) in the current song, right-click on the track radio button, go to Track Settings | Set Natural Arrangement, and select an option.).
Show Messages - You can select to show a flash message when chords are re-interpreted. The choices are: Always, Never, and Once per session.
Normalize MIDI velocities to - If performing live, or at a jam session, it helps to have the volume of all of the songs be similar. With the “Normalize MIDI velocities” feature, you can level the volumes to a setting you enter. For example, you can set all volumes to be 70 and the program will make each song play within those levels.
![]() When you have set the normalize to “on,” the title window at the top of the screen reports that Normalization is set to 70, and that the velocity of the currently playing song has been increased from 49 to 70.
When you have set the normalize to “on,” the title window at the top of the screen reports that Normalization is set to 70, and that the velocity of the currently playing song has been increased from 49 to 70.
Including Melody, Soloist - The normalization will affect bass, drums, piano, guitar, and strings. If you select the “Including Melody, Soloist” option, the normalization will also affect the Melody and Soloist parts.
When a song is loaded, but the required style is not found - In this group of settings, you can control the behavior of the program when a required style is not found. Text files like C:\bb\Data\A_PGMUSIC.NA list the substitute styles to use. You can make your own *.NA file but call it something like MYSTYLES.NA. Don’t edit the A_PGMUSIC.NA file.
OK to substitute with a similar style - If set, this will enable the substitution of styles using the C:\bb\Data\A_PGMUSIC.NA text file and any other *.NA files supplied by third-party styles developers.
If nothing similar found, use this style - This is the style that will be substituted if no better substitute is found in the A_PGMUSIC.NA text file or any other *.NA files.
Message if no style or substitution found - If no substitute style is found, what type of message (if any) should be displayed?
Message if substitution style found - When a substitute style is found, what type of message (if any) should be displayed?
Woodshed Tempo (increase tempo every loop) - When practicing (or “woodshedding”) a tune, it is useful for the tempo to speed up every time the section loops or the song restarts from the beginning.
Woodshed tempo by (default=0 bpm) - This sets the number of bpm that the tempo will change each time through. There are 4 modes to the woodshed tempo field. They are only active when you set a woodshed tempo value other than 0.
1. “Up only,” which is getting faster each loop “forever,” well until tempo=500 which is BB’s maximum tempo.
2. An “up then down” mode that goes up by [a settable increment] up to [a settable maximum] and then starts going down by the increment back to the original where it restarts. For example, a song with a tempo of 140, if you set the tempo to increase by 5, to a maximum increase of 100, the song will go from 140,145,150 etc. to 240, then go to 235,230… back to 140 and cycle again.
3. An “Up then Reset” mode, that goes up in increments up to the settable maximum, then resets to the original and starts again. For example, a song with a tempo of 140, if you set the tempo to increase by 5, to a maximum increase of 100, the song will go from 140,145,150 etc. to 240, then go to 140 and start again.
4. An “Up and stay at Max” mode that goes up until the settable maximum and stays there.
Modes 2 and 3 are analogous to a “treadmill workout,” with programmed changes in speed.
Insert Breaks (silence) in arrangement - This feature is great for practicing tempo control. Select the # of bars, and Band-in-a-Box will play for, say 4 bars (selectable), and then will rest all instruments for the next 4 bars. Once set, this feature works automatically with all songs until you turn it off.
Count-in and Metronome Options
![]() This button opens the Count-in and Metronome Options dialog.
This button opens the Count-in and Metronome Options dialog.
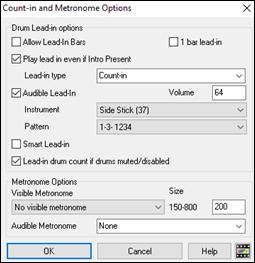
Allow Lead-In Bars - People who use Band-in-a-Box for soloing practice will likely turn the lead-in off to allow endless looping uninterrupted by the lead-in count. To eliminate the lead-in count, select Allow Lead-In Bars to = NO, this will start the song from bar 1 with no lead in.
1 bar lead-in - If this is set, the count-in will be a single bar instead of 2 bars.
Play Lead-In Even If Intro Present - If a song has an intro, it’s usually not necessary to play the 2-bar lead-in count. There’s a new option to always OMIT the lead-in if an intro is present.
Lead-in type - This can be drum patterns instead of “1-2-1234.” You can specify to play two bars of drum patterns instead of the count-in. You may prefer hearing the drum beat to a simple count-in, since it provides more information about the upcoming groove. If you’re playing with Band-in-a-Box live on a “dance floor,” this setting will avoid “dead air” between songs, and keep the drumbeat going. Includes options to have “a” or “b” drum fills or patterns play for the two bars.
Audible Lead-In/Volume - Enables audible count-in. If you would like the lead-in bars to be played, but just want the drum lead-in quieter (or silent) set the Drum Volume to = 0 (for silent).
Instrument/ Pattern - You can select any drum instrument for the count in. You can choose different count-in rhythms, e.g., tap on 2 and 4 instead of 1-2-3-4. There’s a new “smart lead-in” option to silence the drum count-in if a melody lead-in has begun.
Smart Lead-in - A smart lead-in avoids playing the count-in drum sound during a Melody pickup.
Lead-in drum count if drums muted/disabled - Previously, when the drum track was muted (or disabled in a song), the count-in drum click wouldn’t play. This option can play the drum count-in in all circumstances. Drummers who play along with BB by muting the drum track should find this feature useful. To set this option, choose Options | Preferences and set “Lead-in drum count if drums muted or disabled” to true (default is true).
Visible Metronome - You can display a visible metronome on-screen during the entire song (or just the lead-in). Choose the screen position (top-right or center), and the size (up to near full screen size). Also choose the visual metronome pattern (1234, 1-3, 1---, or –2-4). Seeing a metronome on-screen is a great way for a student to learn to keep on the beat, and with a settable size, students can view this from across the room.
Audible Metronome - The three settings for the audible metronome are None, During Record, or During Record and Play.
MIDI File Options
![]() The Preferences [MIDI File] button opens the MIDI file options dialog.
The Preferences [MIDI File] button opens the MIDI file options dialog.
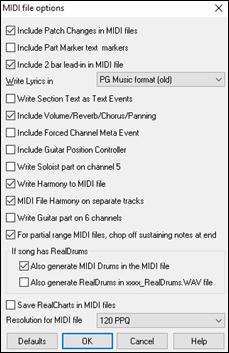
Include Patch Changes in MIDI files will include the patch (instrument) changes.
Include Part Marker text markers will write descriptive text markers to the MIDI file, such as “bar 23, part A.” Text markers are also read in from MIDI files and displayed as Section Markers on the Notation.
Include 2 bar lead-in in MIDI file is selected if you don’t want to create a MIDI file containing the first 2 bars of the 1—2—1-2-3-4 count-in. If there is a Melody pickup, then the 2-bar lead-in will remain in the file.
Write Lyrics in General MIDI or PG Music format - The GM specification has agreed upon specific requirements for writing lyrics in MIDI files, which are now supported, so that lyrics that you save in Band-in-a-Box should show up identically in other MIDI programs. To set this option, choose either General MIDI format or PG Music format. We recommend the GM format.
Write Section Text as Text Events - Your section text can be included in the MIDI file as text events.
Include Volume/Reverb/Chorus/Panning - This will include the volume, reverb, chorus, and panning settings that you have made in the Band-in-a-Box synth window in your MIDI file.
Include Forced Channel Meta Event - This will include the forced channel META event. It is recognized by PowerTracks Pro Audio and other PG Music Inc. programs only.
Include Guitar Position Controller - This will insert a controller 84 which PG Music uses to indicate the fret position. Since some synths also use this for Portamento Control, you should use this setting with caution.
Write Soloist Part on Channel 5 - Normally the program writes the Soloist part on channel 8. Since that could also mean the left hand of a piano track using the convention of channel 8/9 for piano, this option allows you to write it on channel 5 instead.
Write Harmony to MIDI File - If set to YES, the harmony will be written to the MIDI file. If not, just the melody will be written to the MIDI file.
MIDI File Harmony on separate track - If set to YES, the harmony will be written to the MIDI file on separate tracks for each voice. You could use this to print out individual parts to your printer for example.
Write Guitar part on 6 channels - If set to YES, the styles that are Intelligent Guitar Styles will result in a MIDI file that has the Guitar part written on 6 channels (11-16). Then, when you read it in PowerTracks, or another sequencer that uses the convention of 11-16 for guitar strings, the guitar part will display correctly.
For partial range MIDI files, chop of sustaining notes at end - If you have made a MIDI file for part of the song this setting controls whether the notes will sustain at the end of the range in the MIDI file or be cut off.
If song has RealDrums
Also generate MIDI drums in the MIDI file - If your song uses RealDrums for the drum track you may want to uncheck this option.
Also generate RealDrums in xxxx_RealDrums.WAV file - saves RealDrums audio track as a separate wave file so it can be imported into another program for editing.
Save RealCharts in MIDI File - This allows you to save RealCharts MIDI data in MIDI files so that you can study the performances in other programs.
Resolution for MIDI file sets the resolution for MIDI files that you output in a range from 120 to 1920 PPQ. The default is 120 PPQ, which is 4 ms resolution at a tempo of 125.
MIDI Driver Setup
![]() The [MIDI Driver] button launches the MIDI/Audio Drivers Setup.
The [MIDI Driver] button launches the MIDI/Audio Drivers Setup.
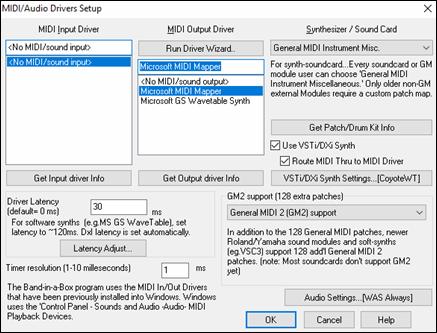
MIDI Input Driver: Select the Driver that you would like to use for input from a MIDI keyboard. If you don’t have a MIDI keyboard, you can select <No MIDI/sound Input>.
MIDI Output Driver - Select a Driver for MIDI Output. This also includes Sound Card output (like Sound Blaster).
Perhaps the easiest way to configure Band-in-a-Box is to press the [Run Driver Wizard] button. The MIDI Output Driver Wizard dialog will take you step-by-step through the process of auditioning and selecting an appropriate driver. This assumes that the appropriate Windows® sound drivers are installed and correctly configured.
Synthesizer / Sound Card:Every sound card or General MIDI sound module can choose “General MIDI Instrument Miscellaneous.” Only older non-GM external modules require a custom patch. Selecting the type of synth allows Band-in-a-Box to automatically load in the appropriate Drum/Patch kit file (*.DK). If you leave this as <synth card not listed > it will automatically default to the General MIDI patch list.
Get Patch/Drum Kit Info - This contains information on setting up custom patch/drum kits.
Use VST/DXi Synth - Check the “Use VST/DXi Synth” checkbox to enable VSTi or DXi playback. To use this option, you must have a polyphonic VSTi or DXi synthesizer installed on your computer, such as the Coyote WT or the Cakewalk TTS-1. It will also be most convenient if your VSTi/DXi synthesizer can use General MIDI or GM2 patches.
Route MIDI Thru to MIDI Driver - If this is unchecked, MIDI Thru (live playing) will be routed to the DXi synth rather than the MIDI Thru drive while the song is playing. (This applies with MME audio drivers only.)
DXi Synth Settings - To select the DXi synthesizer, click the [DXi Synth Settings] button, which will open the DirectX Plugins window. Select your DXi synth and apply real time DirectX effects.
Driver Latency - Software synths (like Coyote WaveTable DXi) have a specific timing issue associated with them; “latency.” This means that it takes about 430ms from the time Band-in-a-Box sends the MIDI information to the Virtual Synthesizer to generate and hear the sound. To keep everything (i.e. the notation display, etc.) “in sync,” you should set this latency option. In most cases, Band-in-a-Box will prompt you to do this. If you are using a regular sound card or MIDI module you should not encounter any latency, so you should set the latency option to zero (0) if it’s not already set this way. Latency is set automatically for DXi/VSTi software synths. Click [Latency Adjust] to manually offset the latency of your driver with the Soft Synth Latency Adjust routine.
GM2 support - The type of GM2 support is set here. The choices are:
General MIDI 2 support: If you are using a newer Sound Canvas (i.e. newer than 1999, or newer than the Roland SC88), then choose this GM2 support.
Roland GS (older Modules): “Older” Sound Canvases (SC55/SC88) support GS, but not GM2. The good news is that they have the same patches available, just at different locations. So if you choose this option, Band-in-a-Box will find the patches at the “GS” locations instead of the “GM2” locations. If you have a newer GS module like the SC8820, it supports both GM2 and GS - you should likely choose GM2.
No GM2 support: Most sound cards (Sound Blasters etc.) don’t have GM2 support yet, so just support the 128 sounds. Band-in-a-Box will use the closest instrument in these cases.
The [Audio Settings] button opens the Audio Settings dialog to set up audio drivers.
MIDI Options
![]() This button opens the MIDI Options dialog.
This button opens the MIDI Options dialog.
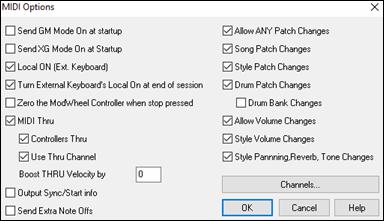
Send GM Mode On at startup / Send XG Mode On at startup - You can elect to have Band-in-a-Box automatically send a GM or XG Mode On command every time the program is started. Toggle this option ON if you have a GM or XG unit to ensure that it is always set to the appropriate mode.
Local ON (Ext. Keyboard) - If you are hearing the information played on your keyboard played twice (an echo effect) then set Local ON to “No.” If you can’t hear what you are playing at all, set Local ON to “Yes.”
Turn External Keyboard’s Local On at end of session - If you have set the Keyboard Local to Off (usually to eliminate MIDI echo) this setting turns it back on at the end of your Band-in-a-Box session.
Zero the ModWheel Controller when stop pressed - If you use Garritan synths, don’t enable this option, because Garritan uses Modulation Wheel for Volume. If you have a MIDI keyboard, and use Modulation Wheel, you might set this.
MIDI Thru - Set to “No” if you don’t want the information played on your MIDI keyboard to be sent through Band-in-a-Box to the output driver.
Controllers Thru - Guitar synthesizers and wind controllers contain large amounts of additional MIDI data which may not be required for Band-in-a-Box and may only serve to hinder the system performance of your computer. To prevent this information from being sent Thru, set this option to “No.”
Use Thru Channel - and-in-a-Box uses the Thru channel as a part, just like the Bass/Drums/Piano, etc. The Thru Channel is re-channeled to the Thru channel as assigned in the MIDI settings dialog. If you would prefer to set the Thru channel yourself from your MIDI controller, set this to “No.”
Boost THRU Velocity by - When playing along on a keyboard to the Band-in-a-Box “band,” if the sound of your keyboard is too quiet and increasing the THRU Volume doesn’t help enough, use this option to boost the THRU velocity and make your THRU playing louder.
Output Sync/Start info - Syncs Band-in-a-Box with an external sequencer.
Send Extra Note Offs - Leave this option to “No” unless you are having trouble with “Stuck Notes” when you press [Stop]. If you set this option to “Yes” the program will send a “global sweep” of all notes off in addition to the selected notes off that are playing when you press the [Stop] button.
Allow Any Patch Changes - Set to “No” to disable All Patch changes.
Song Patch Changes - Songs can be saved with patch changes. If you want to prevent specific instruments loading for a given song, set this option to “No.”
Style Patch Changes - Styles contain patch change information for the instruments that were used when the Style was created. To use your own instrument selection, not the original instruments, change this setting to “No.”
Drum Patch Changes - To disable patch changes in Drums, set to NO.
Drum Bank Changes - This should usually be left unchecked since most synths don’t use bank changes on drums. But, if you require drum bank changes then select this option.
Allow Volume Changes - To prevent any volume changes set to “No.”
Style Volume Changes - To stop embedded style volume changes set to “No.”
Style Panning, Reverb, Tone Changes - If set, styles are allowed to set panning, reverb, and tone if they are set that way in the style.
MIDI Settings
![]() The [Channels] button opens the MIDI Settings dialog.
The [Channels] button opens the MIDI Settings dialog.
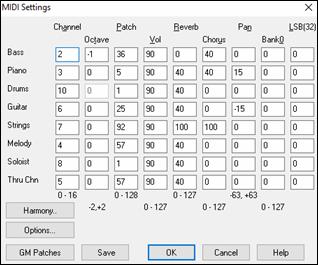
MIDI Channels - Range 0 to 16. If set to 0 the part will be Off/Disabled, which is not the same as muted.
Octave: Adjusts the octave of the part. Range (-2 to +2). Usually set to 0. (Bass is usually set to -1 for most General MIDI (GM) instruments.)
Patch: Range 0 to 128. These are General MIDI patch numbers.
Volume: Range 0 to 127. Average volume setting is = 90. This can also be set from the main screen.
Note: Only General MIDI, XG, and GS instruments respond to Reverb, Chorus, and Bank changes.
Reverb: Range 0 to 127. Default setting = 40.
Chorus: Range of 0 to 127. Default setting = 0.
Panning: Panning refers to the stereo placement (i.e. Left to Right) of a given part’s sound. The range of this parameter is -63 to +63. A setting of 0 is centered in the middle of the stereo field.
Bank0 and LSB(32): Many General MIDI instruments have extra instruments available on higher banks. Usually set to 0. Other settings are multiples of 8 (0, 8, 16 etc.).
These can use either Controller 0 (Bank 0), which is also known as MSB for Most Significant Byte, or Controller 32, also called LSB for Least Significant Byte, or combinations of the two controllers.
Harmony
![]() The [Harmony] button opens the Harmony Channels and Settings dialog where settings for the harmonies are made.
The [Harmony] button opens the Harmony Channels and Settings dialog where settings for the harmonies are made.
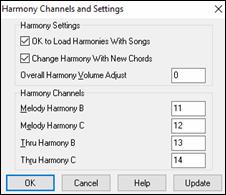
OK to Load Harmonies with Songs - If set to YES, the harmony settings for each song will be loaded and saved with each song. If set to NO, the harmony setting won’t be saved or leaded with the songs. If you are using a certain harmony, you should set this setting to NO, otherwise you have to keep re-selecting the harmony when you load in new songs.
Change Harmony with New Chords - Example: If a harmony is played on bar 1 on a C chord, and then the note is held as the chord changes to a Fm7 chord, (if this setting is set to YES) the harmony notes will change so that they will be still be playing chord tones. If they don’t the harmony sounds dissonant. Leave this setting to YES, unless you have a specific reason to disable it. The harmony is changed by moving the voices to the nearest chord tone.
Overall Harmony Volume Adjust - Sets a level for the overall harmony in a range of -128 to 128, with 0 leaving the settings as programmed in the Harmony file.
Harmony Channels - Band-in-a-Box already uses 7 channels (Bass, Drums, Piano, Guitar, Strings, Melody and Thru channels). Adding these 4 harmony channels produces potentially 11 channels of information.
Soloist
![]() The [Soloist] button launches the More Soloist & Melodist Settings dialog.
The [Soloist] button launches the More Soloist & Melodist Settings dialog.
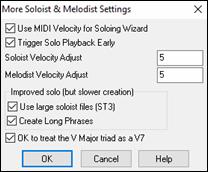 |
Set “Use MIDI Volume for Soloing Wizard” to true if you want MIDI velocity information sent to the Soloing Wizard. If you have a velocity sensitive MIDI device attached to your computer and you want to control the dynamics of the Soloist, you should enable this feature. Set the “Trigger Playback Early” to true to enable song playback to start before the Soloist has actually completed composing a solo. Otherwise, Band-in-a-Box will completely compose a solo before song playback begins. |
Soloist/Melody Velocity Adjust: This box allows you to quickly boost or reduce the volume of the Soloist part relative to the other instrument parts. For a realistic mix the soloist instrument is set slightly louder than the other instruments/parts in a song. The default is 5.
Use large soloist files (ST3): uses larger databases with improved phrases when checked.
Create Long Phrases:, when set to “True” (enabled), instructs the Soloist to use the longest musical phrases it “knows.” Normally, this is used in conjunction with the “Use large soloist files” setting.
OK to treat the V Major triad as a V7: If set, all Jazz MIDI soloist and some Jazz and Country RealSoloists will treat the V chord as V7.
Colors
![]() The [Colors] button in the Preferences dialog opens the Color Selection dialog.
The [Colors] button in the Preferences dialog opens the Color Selection dialog.
You can choose from several color sets using the 256-color palette in Windows®. Choose from pre-made color schemes or make your own. This is like changing the Windows® color scheme in the control panel.
To select a pre-made color scheme, press the [Import] button and choose from the list of schemes. Select [OK] to make the changes permanent. Use the [Export] button to save and share your customized color schemes.
To make your own color scheme, click on the name of the element you wish to change (Chord Area, List Box, etc.), then click on the [Choose] button to bring up the Windows® Color palette and click on the color you desire. Or you can enter the appropriate Red, Green, and Blue values in the boxes provided.
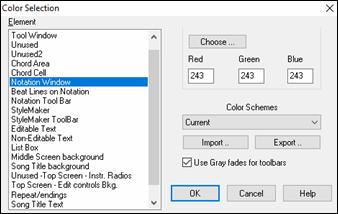
Patch Map
![]() This opens the General MIDI Patch Edit dialog, where you can make a customized General MIDI patch map.
This opens the General MIDI Patch Edit dialog, where you can make a customized General MIDI patch map.
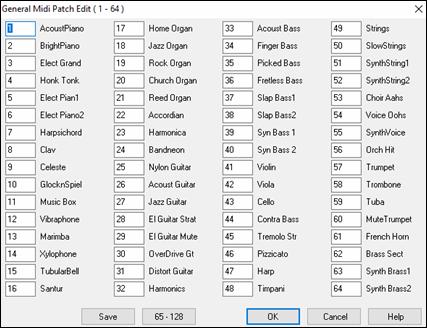
Type in the patch number that your synth uses for each instrument listed. For example, if your sound source has its Acoustic Piano at patch location 41select the box to the left of Acoustic Piano and type 41. Do the same for all of the instruments in the General MIDI patch list. If your synth doesn’t have an exact match, use a close sounding patch that it does have. Once you have made a patch map in this way, whenever Band-in-a-Box encounters Acoustic Piano (which is General MIDI instrument #1), it will look up this Patch Map Location and then send out Patch 41 to your synth/sound module.
Drum Kit
![]() If you have been unable to find a preset drum map that matches your synth’s drum notes, then you may need to type in the drum notes that your sound source uses. To do this, you need to hook your MIDI controller up to play the drum sounds from the keyboard. Play up and down the keyboard to hear all the drum sounds.
If you have been unable to find a preset drum map that matches your synth’s drum notes, then you may need to type in the drum notes that your sound source uses. To do this, you need to hook your MIDI controller up to play the drum sounds from the keyboard. Play up and down the keyboard to hear all the drum sounds.
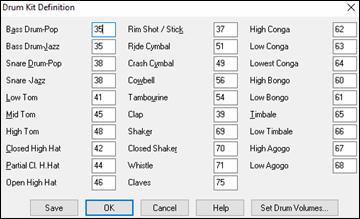
Type the MIDI note numbers for the various instruments as you find them on your drum machine or keyboard. Press the [Save] button to save the kit as MYSETUP.DK. If you are making a kit to save under a different name then save the kit under Options | MIDI Patch Maps, etc. | Save Alternate Patch/Drum Kit.
Customize the Relative Volumes of the Drum Kit Instruments.
Perhaps when you listen to Band-in-a-Box, you feel that the crash cymbal is too loud or the kick drum is too quiet.
![]() The [Set Drum Volumes] button allows you to make the crash cymbal 10% quieter, boost the kick-drum by 15%, and turn off the “tambourine” entirely. Changes apply to any song when this feature is enabled, and playback and written MIDI files will reflect the changes.
The [Set Drum Volumes] button allows you to make the crash cymbal 10% quieter, boost the kick-drum by 15%, and turn off the “tambourine” entirely. Changes apply to any song when this feature is enabled, and playback and written MIDI files will reflect the changes.
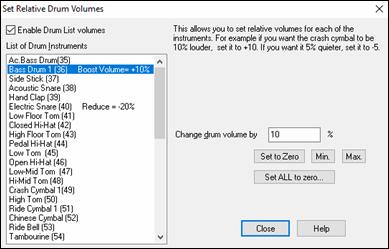
The default settings are to change the volumes by 0 %, which would leave them as they are. If there were a drum note with a velocity of 50, it would be affected as follows:
+40% would change it from 50 to 50+(40%x50)=70
-40% would change it from 50 to 50-(40%x50)=30
The current settings for your drum velocities are saved in the intrface.bbw configuration file.
Favorite Instruments
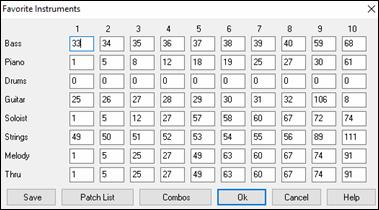
For each of the Band-in-a-Box parts you can assign up to 10 “favorite” General MIDI instruments.
![]() The [Patch List] button displays the General MIDI Patch List of instrument names and patch numbers.
The [Patch List] button displays the General MIDI Patch List of instrument names and patch numbers.
![]() The [Combos] button opens the Favorite Combos dialog.
The [Combos] button opens the Favorite Combos dialog.
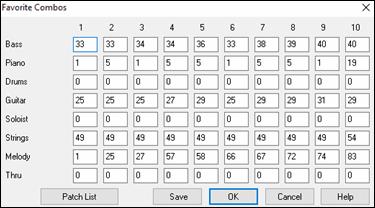
The Favorite Combos dialog allows you to save up to 10 of your favorite instrument combos. For example, you could setup Combo #1 to be an Acoustic Jazz combo which would send out patches like Acoustic Bass, Acoustic Piano, Acoustic Guitar, Flute, etc. After you finish typing in the instrument patch numbers select the [Save] button.
Output Chords on Channel
![]() The Preferences [OutputCh.] button opens the Output Chords on Channel dialog.Some external music hardware devices equire chords played in root position to drive them in real time.
The Preferences [OutputCh.] button opens the Output Chords on Channel dialog.Some external music hardware devices equire chords played in root position to drive them in real time.
|
An example of this is the TC-Helicon Voice Live, which lets you sing into a microphone and harmonize your voice according to the chords that are input to the device. |
Transpose
![]() The Preferences [Transpose] button opens the Settings for transposing songs when loaded or “Do it Now” dialog.
The Preferences [Transpose] button opens the Settings for transposing songs when loaded or “Do it Now” dialog.
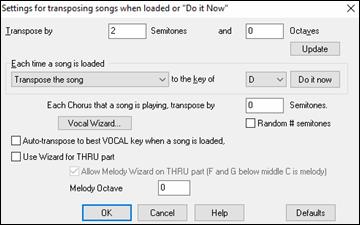
When playing along on your MIDI keyboard, you can set the Thru transpose to transpose semitones or octaves. You can define a “favorite key” and Band-in-a-Box will optionally transpose any and all loaded songs to that key. This is a great feature for practicing in a certain key.
You can also set the THRU transpose to the favorite key to transpose the THRU part so that you can always play along in your favorite key (regardless of the actual key of the song). To activate this feature by key strokes, press Ctrl+Shift+K.
To practice a song in different keys, have it transpose by a specified number of semitones each chorus, or let Band-in-a-Box transpose it a random number of semitones for more of a challenge.
![]() This launches the Vocal Wizard, which shows the best keys given a singer’s vocal range.
This launches the Vocal Wizard, which shows the best keys given a singer’s vocal range.
When “Auto-transpose to best VOCAL key when a song is loaded” is checked, the song will be automatically transposed to the best key for a vocalist, depending on the settings in the Vocal Wizard.
If you have an external keyboard, enable the “Use Wizard for Thru part” option and also the Wizard checkbox on the main screen. Band-in-a-Box will make sure you never hit a wrong note when playing live!
When “Allow Melody Wizard on THRU part (F and G below middle C is melody)” is set, the F and G below middle C on a connected MIDI keyboard will play melody notes, assuming a Melody track exists. A, B, C, D, and E are approach notes from below. F# = repeat note. D, C, B, and A are approach notes from above. Low E, F, and G change the melody octave.
Record Filter
![]() The Preferences [Rec. Filter] button opens the Record Filter dialog.
The Preferences [Rec. Filter] button opens the Record Filter dialog.
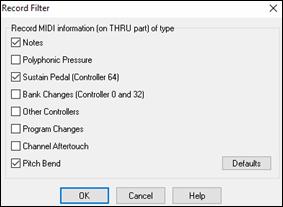
Record Filter supports all MIDI controllers and sustain pedal. You can record any type of MIDI information to the melody or soloist tracks by using the Record Filter feature to select which types to include.
With this window you can choose what types of MIDI information Band-in-a-Box will record.
Notation
![]() The [Notation] button opens the Notation Window Options. If the Notation window is not open, the program will launch it.
The [Notation] button opens the Notation Window Options. If the Notation window is not open, the program will launch it.
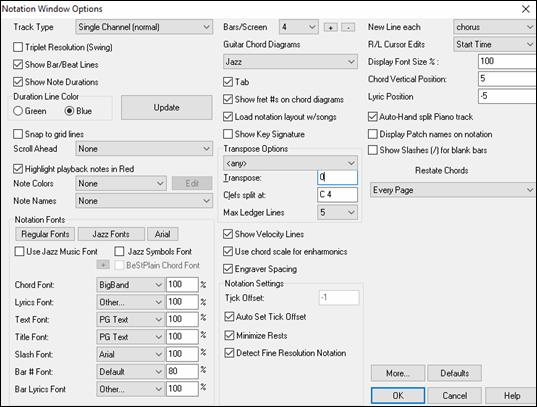
The options in this dialog are described in Chapter 8 .
Lead Sheet Options
![]() The [Leadsheet] button opens the Lead Sheet Options dialog.If the Lead Sheet window is not open the program will open it
The [Leadsheet] button opens the Lead Sheet Options dialog.If the Lead Sheet window is not open the program will open it
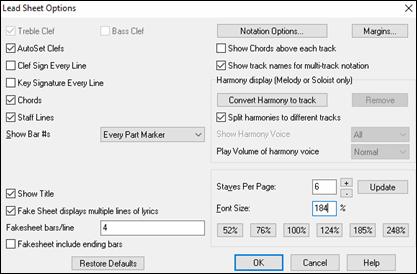
The options in this dialog are described in Chapter 8 .
Audio Settings
![]() The Preferences [Audio] button opens the Audio Settings dialog.
The Preferences [Audio] button opens the Audio Settings dialog.
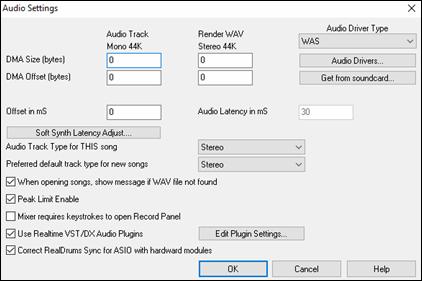
Audio Driver Type - MME is the default audio driver type that is used in Windows®. MME is good, but there is latency (delay) associated with MME drivers. ASIO is a faster audio driver developed by Steinberg. It has much lower latency than ordinary MME drivers, but usually can be used by one program at a time. WAS (Windows® Audio Session) has ultra-low latency (< 25 ms on a typical Windows® PC), so audio operations like playing or sending out information via MIDI happen with no noticeable delay. When you boot up Band-in-a-Box, it will be already set to use this driver without any action from you, but if you want to change the settings, press the [Audio Settings [WAS]] button.
ASIO Audio Driver
When you select ASIO, the ASIO Audio Drivers dialog will open. This dialog lets you choose an ASIO driver. You can arrive at this dialog in 3 different ways:
- If you haven’t used ASIO drivers, but Band-in-a-Box detected them, and you answered “Yes” when Band-in-a-Box asked if you want to use an ASIO driver.
- If, within the Audio Preferences, you change the Audio Driver Type from MME to ASIO.
- If the Audio Driver Type is already set to ASIO, but you later press the [Audio Drivers…] button in the Audio Preferences.
The “Select one ASIO Driver” list box lets you select an ASIO driver to use. You can only select one ASIO driver at a time.
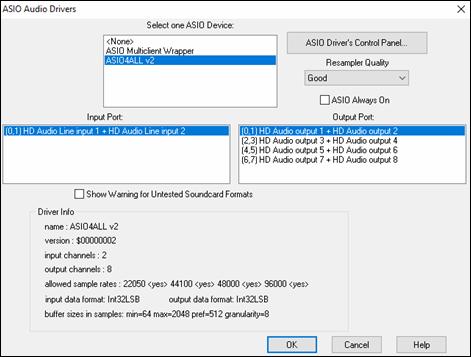
Once you have selected an ASIO driver, you will see the Input Port and Output Port list boxes filled with your driver’s input and output ports. By default, the first of each will be selected. You are allowed to select different ports (but only one input and one output port at a time can be selected). The ports you selected will be available for output within Band-in-a-Box. If you do not hear input or output, then you may need to try different ports than the defaults. You may need to read your sound card’s instructions to determine the correct ports to use.
The ASIO Driver’s Control Panel button launches the Control Panel for your driver. This usually lets you adjust the latency by letting you choose different buffer sizes in milliseconds. Some drivers might let you choose the buffer size in samples, which is less convenient than milliseconds. The smaller the buffer size, the lower the latency, and the faster the response. Smaller buffers require more CPU power and if you hear dropouts or artifacts, you may need to increase the buffer size.
Since many ASIO drivers do not support multiple sample rates, Band-in-a-Box has a built-in resampler which lets you play and record songs that have a different sampling rate than the rate(s) directly supported by your ASIO driver. For example, if the driver does not support 44.1K sampling rate, but supports 48K, then Band-in-a-Box will use the resampler to convert to 48K when playing back, and to convert FROM 48K when recording. The Resampler Quality combo lets you choose Fast, Good, Better, or Best. Fast is the quickest but is the lowest of the four levels of quality. Best is the slowest (uses more CPU time), but the most transparent and accurate quality.
The ASIO Driver’s Control Panel button launches a settings dialog specifically provided by your driver manufacturer. This usually lets you adjust the latency, and usually you will have a choice between buffer sizes in milliseconds.
Show Warning for Untested Soundcard Formats can be unchecked if you do not want to see the warning message for ASIO drivers that have not been tested in Band-in-a-Box.
The Driver Info field shows various characteristics of your driver.
The Name is the driver’s name.
The Version is the version number of your driver.
Input Channels is the total number of mono input channels that your sound card has. (Note: Band-in-a-Box groups each into a stereo pair.)
Output Channels is the total number of mono output channels that your sound card has. (Note: Band-in-a-Box groups each port into a stereo pair.)
The Allowed Sample Rates field shows the sample rates allowed by your sound card’s ASIO driver. Band-in-a-Box has a built-in resampler which lets you play and record files that aren’t directly supported by your ASIO driver.
The Buffer Sizes in Samples shows the range of allowed buffer sizes. The “Pref” is the preferred size, and this is the size that Band-in-a-Box uses. Your driver may alter the preferred size if you’ve launched the ASIO Driver Control Panel and have selected a new buffer size from within the driver’s Control Panel. If your driver changes the preferred size, then Band-in-a-Box will be aware of the new preferred size.
MME Audio Drivers
If your PC has multiple sound cards, the [Audio Drivers] button lets you choose which one to use. Most people have a single sound card, so don’t require this feature. But if you have added an audio device (such as a USB Audio Adapter), you would have multiple audio devices, and are now able to choose which one to use.
![]() Choose MME as the “Audio Driver Type” and click on the [Audio Drivers] button to select which audio driver to use. This launches the Audio Drivers dialog.
Choose MME as the “Audio Driver Type” and click on the [Audio Drivers] button to select which audio driver to use. This launches the Audio Drivers dialog.
|
The “Output always on” option allows you to use VST or Canyon GM DXi at all times, so MIDI can be routed and heard using these Plugins when the program is stopped. |
The DMA Size and DMA Offset settings are set automatically by the auto-testing of the sound card. This test can be repeated by pressing the [Get from sound card…] button. The default value for all of these settings is 0 (zero). You can override these settings if required, but it is usually not necessary.
The Offset in mS is not a setting that gets set automatically. It defaults to zero. This allows you to adjust the timing that the sound card plays audio in relation to MIDI. Normally you’d leave this at zero, but if you need to fine tune the synchronization of audio to MIDI you could try changing this setting.
Audio Latency in mS - DirectX audio plug-ins and DXi synthesizer plug-ins can have playback latency (the delay between when a note is played, and when it is heard). Adjust “Audio Latency in mS” to fine-tune for your computer. If you have a fast computer and excellent sound card, the audio latency can be adjusted rather low. However, if you hear audio dropouts, you can set the latency as high as 2000 milliseconds.
Display warnings for detected audio stuttering - If this is enabled, then when audio stuttering is detected, a flash message will be displayed after playback has stopped. This only applies to MME audio drives (not ASIO). (Note: This option is visible only when MME is selected for the audio driver type.)
Audio Track Type for THIS song - You can choose between mono and stereo for the audio track. Tracks can be edited in either format and converted from stereo to mono or vice versa. You can change a project from mono to stereo at any time. For example, if you have already recorded a mono track, changing the setting will convert the track to stereo for you.
Note: The built-in audio plug-ins work for either mono or stereo tracks.
Preferred default track type for new songs - This setting (mono/stereo) sets the default recording type for new songs that you record. For example, if you have a stereo microphone, you should likely record in stereo.
When opening songs, show message if WAV file not found - A Band-in-a-Box song called “My Song.MGU” will have the associated wave file called “My Song.wav.” If Band-in-a-Box loads this song file and it can’t find its associated file, it will put up a message to that effect. If the warning message is distracting, and for some reason you don’t have the wave files that were recorded with the songs then you can disable that message with this option box (disable).
Peak Limit Enable - Check the “Peak Limit Enable” checkbox to restrict excessive levels from being recorded (Filter).
Mixer requires keystrokes to open Record Panel (Windows 95 only) - If you are running Windows® 95, check this box to allow access to the Record Panel from Band-in-a-Box. Do not check if using Windows® 98 or greater.
Use Realtime DX Audio Plugins - The advantage of real time processing is that you can set effects today, and if you decide you don’t like the effects tomorrow, the settings can be easily changed, since the real time effects did not permanently affect your audio track on the hard disk. Check “Use Realtime DX Audio Plugins” in the Preferences [Audio] settings to enable real time DirectX audio plug-ins.
Correct RealDrums Sync for ASIO with hardware modules - Some systems have a sync problem when using RealDrums with hardware modules (zero latency). If this is set, the sync problem is fixed as the song starts to play (bar 1).
Guitar Settings
![]() The Preferences [Guitar] button opens the Guitar Settings dialog.
The Preferences [Guitar] button opens the Guitar Settings dialog.
The Guitar Settings dialog allows you the ability to adjust various parameters on the virtual guitar fretboard so that music can be displayed effectively (and easily) on this window, regardless of the original instrument intended for the track data. It also offers the ability to enter notation using the virtual guitar and play back track data in specific fretboard positions for educational and sight-reading purposes.
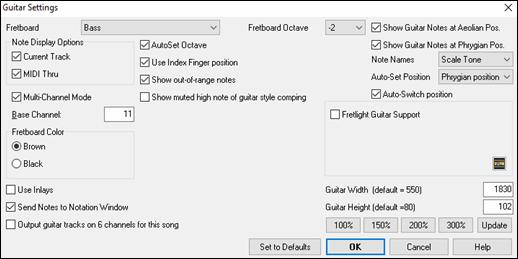
Fretboard - You can choose the regular guitar, bass, ukulele, mandolin, banjo, and violin as well as the alternate tunings available in Band-in-a-Box, such as DADGAD, Double Drop D, and Nashville high-strung tunings.
Fretboard Octave - For example, if the music is very low and you need to boost the octave to display it on the guitar, set the octave to 1 or 2.
Note Display Options - You can choose what will be displayed on the guitar fretboard. If MIDI Thru is selected, the fretboard will display the music played on a MIDI keyboard. If Current Track is selected, the current track will be displayed. You can select to display both.
Multi-Channel Mode - If this is enabled, the guitar will display information on multi channels on guitar strings 1 to 6. The channels will be determined by the Base Channel below.
Base Channel (default=11): This determines the starting channel when the Multi-Channel Mode is enabled. If this is set to 11, channels 11 to 16 will be used for guitar stings 1 to 6.
AutoSet Octave - If this is enabled, the octave will be set automatically.
Use Index Finger position - If this is enabled, the scale will use the index finger, instead of the little finger, to play notes that are one fret outside of the normal position.
Show out-of-range notes - Enable this if you want to see any note displayed on the guitar even if it is out of the guitar range.
Show muted high note of guitar style comping - If this is enabled, the applicable high note that is muted or left out with three note jazz voicings will be displayed.
Fretboard color - The fretboard color can be brown or black.
Use Inlays - Enable this option if you want to see a guitar inlay along the neck.
Send Notes to Notation Window:If this is enabled, clicking a guitar string will insert a note at the current time line on the Notation window.
Output guitar tracks on 6 channels for this song:If this is selected, notes played on each of the six guitar strings will be assigned to one of six different MIDI channels.
Show Guitar Notes at Aeolian Pos. / Show Guitar Notes at Phrygian Pos - The note names can be displayed at the Aeolian position, the Phrygian position, or both.
Note Name - You can choose which notes will be displayed on the fretboard. Options are None, Root Only, Chord Tones, and Scale Tones.
Auto-Set Position:Positions can be set automatically to None, Aeolian, or Phrygian.
Auto-Switch position - This option automatically chooses the best position when a track is loaded.
Fretlight Guitar Support - The Fretlight is a hardware guitar, which has red LED lights on the frets. (See www.fretlight.com for more information.) If this option is enabled, information on the Guitar window will be displayed on the Fretlight.
Left-Handed Fretlight - Enable this if you have a left-handed Fretlight guitar.
Open Guitar with Playback - The Guitar window must be open for the Fretlight to receive guitar notes in Band-in-a-Box. Enable this option so that the Guitar window will open every time play is pressed.
Show Scales on Fretlight - If this is enabled, the scales that show on the Guitar window will also show on the Fretlight guitar.
Guitar Width /Guitar Height / [Update] - The Guitar window can be sized by typing in the values or pressing the preset buttons. When you type in values, press the [Update] button.
Big Piano Settings
![]() This Preferences button opens the Big Piano Settings dialog.
This Preferences button opens the Big Piano Settings dialog.
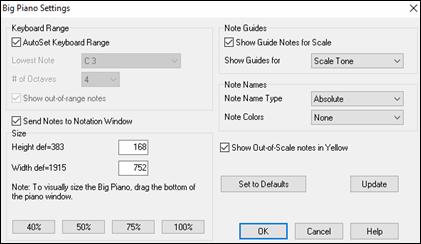
This dialog allows you to set various options on the Big Piano.
- You can set a specific range for the Big Piano, a starting note and a number of octaves, by over-riding the “auto” settings.
- “Show out-of-range notes” ensures that all notes will be displayed.
- If the “Send Notes to Notation Window” checkbox is enabled, clicking a virtual key on the big piano will insert a note to the notation track. (Note: The Notation window must be opened and set to editable notation mode.)
- If “Note Guides” is selected, guide notes will be shown on the keyboard. The guide notes can be scale tones, chord tones, or roots only.
- Note Names and Note Colors can be used as in the Notation settings.
- There is an option to Show Out-of-Scale notes in Yellow.
- The size of the piano keyboard can be entered in pixels, or set with the preset buttons, or set by dragging the bottom border of the window.
Lyric Window Options
![]() The [Big Lyrics] button opens the Lyric Window Options.
The [Big Lyrics] button opens the Lyric Window Options.
|
Individual color elements can be picked or you can choose one of the presets. Display Chord Symbols will interleave the chord symbols with the lyrics. Show chord symbols above the lyrics will show the chords on a separate line. With the Scroll lyrics a page at a time option selected the Big Lyrics scroll a page at a time. When the lyric cursor reaches the next-to-last line of the lyrics it will scroll to the top of the page, allowing uninterrupted reading of lyrics. Auto-open lyrics window for songs with lyrics automatically opens the Big Lyrics window when a song with lyrics is opened in Band-in-a-Box. |
Karaoke CDG Window Settings - To open a Karaoke CDG file use File | Open, and find a WAV, MP3, or WMA file that has a same named CDG file in the same folder. With “Load CDG file when opening audio file” selected the Karaoke window will open and display the lyrics.
You can choose to have a background to the window, either a moving one, or fixed picture. These pictures are in the C:\bb\Data\KaraokeBMP folder, and you can add your own BMP or JPG image to that folder.

Print Options
![]() The [Print] button opens the Print Options dialog.
The [Print] button opens the Print Options dialog.
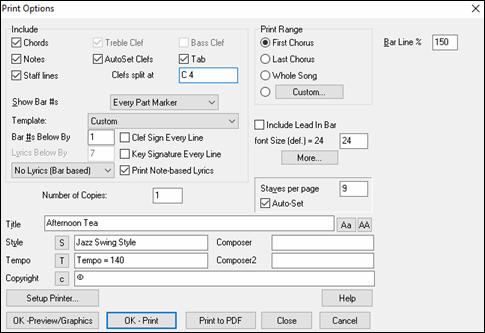
The options in this dialog are described in Chapter 8.
Overrides
![]() Overrides are available to see which other information gets loaded from a file, such as patches, harmonies, volume/reverb/chorus/panning/banks. For example, you can set every song to load with looping ON, and don’t load any reverb settings from songs.
Overrides are available to see which other information gets loaded from a file, such as patches, harmonies, volume/reverb/chorus/panning/banks. For example, you can set every song to load with looping ON, and don’t load any reverb settings from songs.
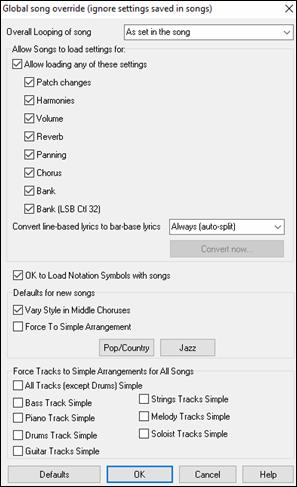
This dialog allows you to set the overall song looping (always OFF, always ON, or as set in the song).
![]()
For example, if you want every song loaded to have looping set to on, then set “Always set loop to ON.”
![]()
But if you are going out on a playing job, and don’t want any songs to loop, then set it to “Always set loop to OFF.”
![]()
If you want the settings to work the same way they did in previous versions, use the “As set in the song” setting, or press the [Defaults] button.
Allow Songs to load settings for - If set, these items will be allowed to be loaded from songs. If not, the settings will be ignored when loading songs.Convert line-based lyrics to bar-based lyrics - In the previous versions, there were line-based lyrics, which could be entered for each line on the Notation window. You can no longer enter this type of lyrics, but if your existing song has line-based lyrics, Band-in-a-Box can convert them to bar-based-lyrics. This option allows you to choose how the conversion should occur when the song with line-based lyrics opens. The default is “Always (auto-split),” which will convert line-based lyrics to bar-based lyrics and splitting them into 4 bars. If you choose “Always (don’t split),” line-based lyrics will be converted but they won’t be split into 4 bars. You can also choose not to convert line-based lyrics automatically. If the current song has line-based lyrics, you can press the [Convert now] button to convert them to bar-based lyrics.
OK to Load Notation Symbols with songs - If this is not selected, notation symbols (slurs, staccato, crescendos) will not be loaded from the song.
The options under Defaults for new songs are settings from the Song Settings dialog.
When Vary Style in Middle Choruses is selected (default), the song will play in substyle B throughout the middle choruses, playing substyle A for the first and last choruses only. If this setting is not selected, then the substyle changes will follow the part markers entered on the Chord Sheet.
When Force to Simple Arrangement is selected, the song play a simpler (less busy or embellished) arrangement.
The [Pop/Country] preset button turns both of these settings off for a typical Pop or County arrangement that follows part markers and does not embellish chords.
The [Jazz] preset button turns both of these settings on for a typical Jazz arrangement to support soloing over the middle choruses and allow Jazz chord embellishments.
Use the options under Force Tracks to Simple Arrangements for All Songs to set individual tracks or all tracks to simple arrangements for all songs. If you want to force simple arrangements on a song-by-song basis, use the [Simple] button on the toolbar.
RealDrums
![]() The [RealDrums] button opens the RealDrums Settings dialog.
The [RealDrums] button opens the RealDrums Settings dialog.
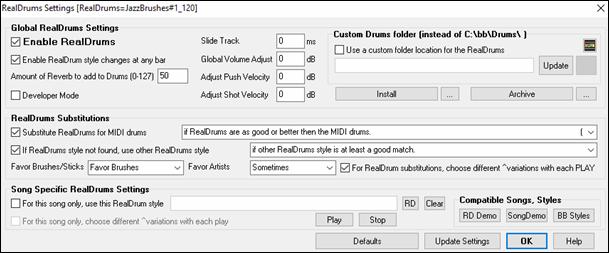
The options in this dialog are described in Chapter 7.
RealTracks
![]() The RealTracks Settings dialog lets you control the RealTracks.
The RealTracks Settings dialog lets you control the RealTracks.
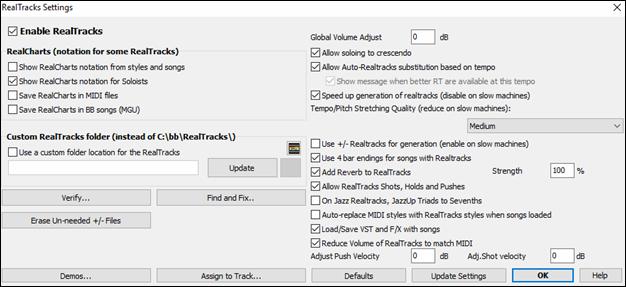
The options in this dialog are described in Chapter 7.
Tranzport
![]() Tranzport is a wireless hardware device that provides remote control for Band-in-a-Box.
Tranzport is a wireless hardware device that provides remote control for Band-in-a-Box.
First, make sure that the TranzPort is installed and working. This can be determined by running Band-in-a-Box and looking at the list of MIDI Drivers (Options | MIDI/Audio Driver Setup). If “TranzPort” appears on the list of MIDI-IN and MIDI-OUT drivers, then the TranzPort is installed correctly.
Enable TranzPort support for Band-in-a-Box in the Tranzport Settings dialog.
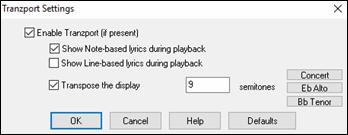
If you want lyrics to display on the TranzPort during playback, set these options.
Players of non-concert pitched instruments can use “Transpose the display.” For example, an Alto sax player would press the “Eb Alto” button, and then the TranzPort display would show chords transposed to his key.
Practice
![]() The Practice Window allows convenient “1-click” access to many Band-in-a-Box features that help you with practicing.
The Practice Window allows convenient “1-click” access to many Band-in-a-Box features that help you with practicing.
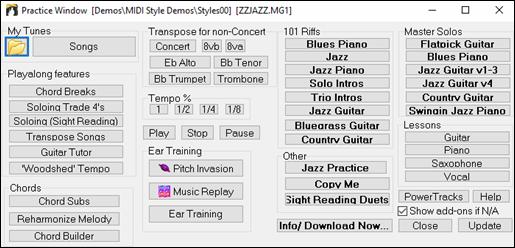
The details of this dialog are described in Chapter 12.
Reverb
![]() The PG Music Reverb window lets you select the Audio Reverb type or make your own.
The PG Music Reverb window lets you select the Audio Reverb type or make your own.
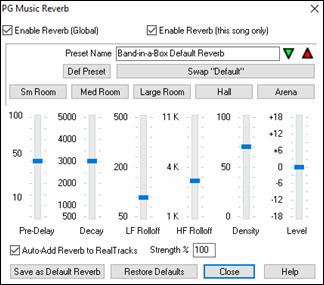
The settings in this dialog are described in Chapter 7.
DAW Plugin
![]() This gives access to the DAW plug-in options available in the Plugin settings dialog.
This gives access to the DAW plug-in options available in the Plugin settings dialog.
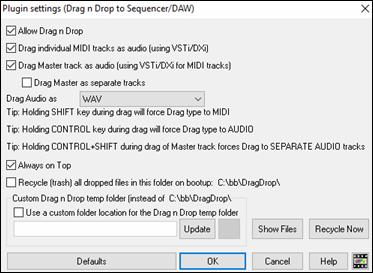
The options in this dialog are described in Chapter 13 .
Play Menu
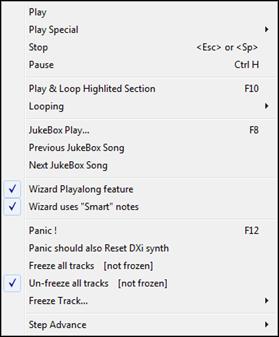
Play
This plays the current arrangement from the start without regenerating the parts, unless they have not yet been generated. Edits to accompaniment parts are kept.
Play Special opens a submenu with more options for playing the song.

Play (and Generate)
This generates a new arrangement and plays the song.
Generate (even if tracks are frozen)
When you do this, the song will regenerate, the tracks will get rewritten, and the song will stay frozen. So, if you’re freezing songs to get the instant playback with RealTracks but get tired of the “same-old” frozen arrangement, just press Shift+Play, generate a new arrangement, and press Save. Then the new “fresh-frozen” arrangement will play instantly, even with many RealTracks.
Play from Bar…
Choose a chorus and bar to play from in the current arrangement. Parts are not regenerated. Use this command during playback to jump to any bar in the song.
Play from Current Position
When the song is stopped this command starts playback again at the bar with the highlight cell.
Go (Open and Play)
This launches an Open File dialog for selection of any song in any directory. The selected song loads and plays automatically in Band-in-a-Box.
Stop
This stops playback or recording. To resume playback from the current bar, use the Play From Current Position command or the [Play from Bar…] toolbar button. To play from the start of the song, press the [Play] toolbar button.
Pause
This pauses the song. Repeating this command resumes play from the exact location where the song was paused.
Play & Loop Highlighted Section
Drag the mouse cursor to select a region of bars in the Chord Sheet and then use this command to play the selected region as a loop.
Looping
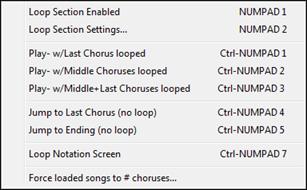
You can loop any section of the song. The program will then start playback at the first loop point and play the looped section until stop is pressed or looping is turned off.
Looping of a section of the song is enabled with the Loop Section Enabled command in the [Loop] toolbar button, the Loop Section Enabled command, or the keystroke NUMPAD 1.
Open the Loop Section Settings dialog with the menu command, by clicking the [Loop] button in the toolbar, or pressing NUMPAD 2.
The remaining commands in this submenu are also found in the Loop Section Settings dialog.
Force loaded songs to # choruses will set every song that you load to the same number of choruses.
Juke Box Play
This opens the Options for Juke Box dialog to select and play a jukebox list.
Previous Juke Box Song / Next Juke Box song
This allows you to navigate back and forth in a juke box set list.
Wizard Play Along feature
The Wizard is a play along feature that allows you to use the QWERTY keyboard or your connected MIDI keyboard to play along with Band-in-a-Box. The Wizard is only active during playback.
Wizard uses “Smart” notes
Toggle this on so the Wizard will only play notes based on the chord/key of the song. Toggle “Smart” notes OFF (unchecked) to have the Wizard provide you access to the chromatic scale.
Panic!
Select this if your MIDI notes are stuck ON and it’s driving you crazy!
Panic should also Reset DXi synth
When selected, hung DXi/VSTi notes are also cleared by the Panic feature.
Freeze all tracks
This freezes all tracks – MIDI, RealTracks, and RealDrums – for fast replay without regenerating tracks.
Un-freeze all tracks
This unfreezes tracks to allow normal regeneration.
Freeze track
This allows the selection of a single track to freeze.
Step Advance submenu
When a song is paused these commands can be used to navigate step-by-step through the currently selected track. For example, if the current track is set to the Melody track using the row of buttons on the Notation window, Lead Sheet window, or Guitar window; pressing the advance buttons will display the next note or chord of the melody on the piano display, guitar display, lead sheet, and notation. This is a great way to study the notes being played, and to navigate around the track.

Melody Menu
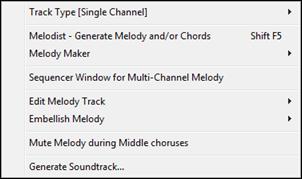
Track Type
Normally you’d leave the track type set to Single. But you can set it to:
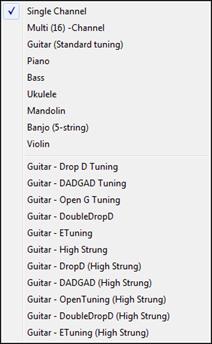 |
|
Melodist – Generate Melody and Chords launches the Melodist feature.
Melody Maker submenu items allow you to edit Melodist files using the Melody Maker.

Sequencer Window for multi-Channel Melody
There are 2 tracks in Band-in-a-Box to add your own recordings. These are the Melody and Soloist tracks. Normally, you would want a single part on each of them, but since MIDI information can have separate channels, it is possible to store 16 separate parts on each of the Melody and Soloist tracks. When the Melody or Soloist track has been set to “Multi (16)-Channel” we refer to this as “Sequencer Mode.” Selecting this command will then launch the Sequencer Window. Then you can customize which channels will play and display.
Edit Melody Track submenu
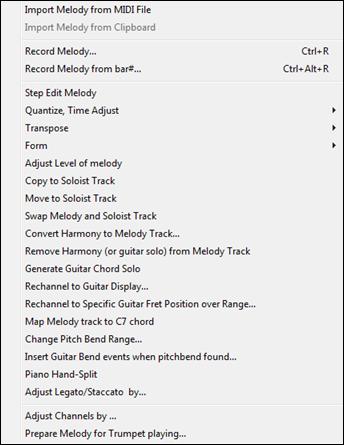
Import Melody from MIDI File allows you to import MIDI data from a file (*.MID) into the Melody track.
Import Melody from Clipboard allows you to import MIDI data that has been pasted into the clipboard (e.g., from a sequencer such as PowerTracks).
Record Melody launches the Record Melody dialog to record a MIDI melody.
Record Melody from Bar # starts recording at the current location of the highlight cell after playing a two bar lead-in.
Step Edit Melody allows you to enter/edit a melody in step time from the Notation window. This uses an event list.
Quantize, Time Adjust
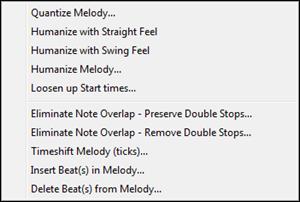
Quantize Melody opens the Quantize Melody Options dialog. The Humanize Melody… feature is an advanced version of this function.
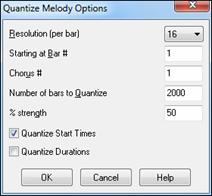 |
Resolution Choose the division you would like the track quantized to. Choosing 16 will Quantize to 16th notes. |
Humanize with Straight Feel / Humanize with Swing Feel
Band-in-a-Box uses intelligent humanization routines, which can humanize a melody from one feel to another, from one tempo to another, and vary the amount of swing in 8th notes (but not randomly). The results are very musical with natural sounding MIDI melodies.
Humanize Melody
Opens the Melody: Quantize to New Tempo or Feel dialog. The humanize effect is broken down into 5 main categories: Tempo, Lateness, 8th Note Spacing, Legato, and Feel.
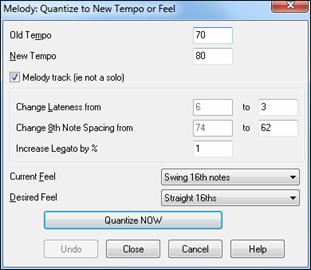
Loosen up Start Times is a dedicated function to vary the start times of notes on the Melody or Soloist tracks, with options for what notes to affect (harmony, chords) and amount of variance.
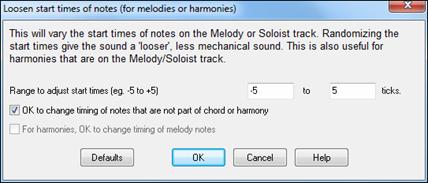
Eliminate Note Overlap - Preserve Double Stops / Eliminate Note Overlap – Remove Double Stops opens a Choose Range dialog to select the range of bars where note overlap will be eliminated while double stops are either preserved or eliminated.
Timeshift Melody (ticks) allows you to move the Melody forwards or backwards in small increments relative to the rest of the song tracks. (Measured in ticks or parts per quarter, PPQ.)
Insert Beat(s) in Melody allows you to insert a blank beat or beats into the song relative to the current time signature.
Delete Beat(s) from Melody allows you to delete a beat or beats from the song relative to the current time signature.
Transpose shows a submenu with functions for transposing the Melody track.

Transpose Melody only allows you to transpose the melody track without affecting the other tracks in the song.
Transpose One Octave DOWN / Transpose One Octave UP transposes the Melody part one octave in either direction. This is often useful if the Melody instrument has been changed. Transposing can be done while the song plays.
Form
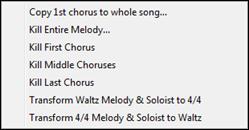
Copy 1st chorus to whole song stretches the melody track out over the entire song (i.e. first, last, and middle choruses).
Kill entire melody erases the melody track and any data that was contained therein.
Kill First Chorus / Kill Middle Choruses / Kill Last Chorus
These menu commands allow you to eliminate the Melody from any chorus.
Transform Waltz Melody & Soloist to 4/4
If you have a song with a 3/4 time signature, you can instantly hear it as a 4/4 feel. Simply load the Waltz song and then change the style to a 4/4 style. Band-in-a-Box uses intelligent algorithms to transform the melody to the new time signature.
Transform 4/4 Melody & Soloist to Waltz
You can automatically transform any 4/4 song/melody to a Waltz 3/4 feel. Simply load in any 4/4 song and change the style to a Waltz style. The program will offer to transform the melody so that it works as a Waltz. It’s fun and educational to hear and play familiar songs in a Waltz feel.
Adjust Level of melody allows you to increase or decrease the volume (velocity) of the Melody track without affecting the other tracks.
Copy to Soloist Track copies the entire contents of the Melody track to the Soloist Track. Useful for a temporary holding area for your Melody or bouncing tracks.
Move to Soloist Track copies the entire contents of the Melody track and erases the original data from the Melody track, preparing it for a new track or data.
Swap Melody and Soloist Track performs a “double copy/move” so that the data that was in the Melody track gets transferred to the Soloist track and vice versa. This is also known as track bouncing.
Convert Harmony to Melody Track… converts a single line Melody track to include the current harmony selection.
Remove Harmony (or guitar solo) from Melody Track removes a harmony from a track, providing that the harmony was put there by Band-in-a-Box in the first place using the Convert Harmony to Melody Track command.
Generate Guitar Chord Solo opens the Guitar feature dialog for generating a guitar chord solo.
Auto-Rechannel to Guitar Display converts channels on a track to channels 11 to 16. Channels 11 to 16 are used by Band-in-a-Box to indicate strings 1 to 6 of a guitar. It uses the current position marker on the guitar for this command. A popup question will ask if you want to include events that are already on the guitar channels.
Rechannel to Specific Guitar Fret Position over Range changes the fret position over the selected range.
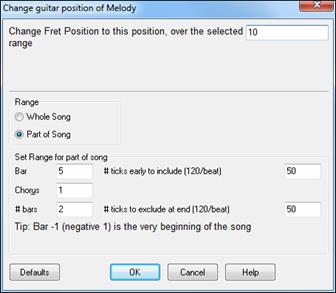
Map Melody track to C7 chord is a useful tool when making styles.
Change Pitch Bend Range lets you set the range in semitones.
Insert Guitar Bend events when pitch bend found will insert controllers so the guitar will display bends.
Piano Hand-Split manually splits a piano part on a Melody or Soloist track using the intelligent hand-splitting routines. The left/right hands display in red/blue on the big piano, and on bass/treble clefs on the notation. Import a piano MIDI file to the Melody track to get a split-hands display and printout.
Adjust Legato/Staccato by…
This allows you to increase legato of the Melody track by N ticks, avoiding the next note by M ticks, or reduce the length of notes by N ticks, preserving a minimum of M ticks duration of notes. To increase legato of the notes, enter a positive number in the first dialog. The duration of notes in the track will be increased by this number of ticks. Then, in the next dialog, specify the number of ticks to avoid next note. To reduce the length of notes, enter a negative number in the first dialog. The duration of notes in the track will be decreased by this number of ticks. Then, in the next dialog, specify the minimum duration of notes.
Adjust Channels by will adjust all MIDI channels by the number value entered.
Prepare Melody for Trumpet playing rechannels the Melody track to use the PG Trumpet 1 patch in SampleTank. The track type is changed to multi-channel and Flash confirmation message is displayed.
Embellish Melody shows a submenu with options for enabling and customizing the Melody embellishment feature.
![]()
Embellish Melody during playback launches the Embellisher dialog. This optionally embellishes the Melody during playback.
Embellish Melody Dialog allows you to customize the settings of the Embellisher, choose an embellisher type from presets, and make a particular Embellishment permanent.
Mute Melody during Middle Choruses to allow for soloing.
Generate Soundtrack launches the SoundTrack feature, which allows you to generate music in the style you choose for any length of time you specify. As the “producer,” you select the genre, length of time, instruments, and fade-in/fade-out options. The SoundTrack adjusts the tempo and duration to match the settings, and then allows you to save the file as a WAV, WMA (Windows® Media Audio), or MP3 file.
Soloist Menu
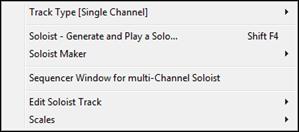
Track Type
Normally you’d leave the track type set to Single. But you can set it to:
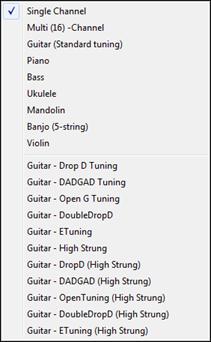 |
|
Generate and play a Solo
Opens the Select Soloist dialog where a preset Soloist style can be selected or your own Soloist can be defined.
Soloist Maker submenu items allow you to edit Soloist files using the Soloist Maker.
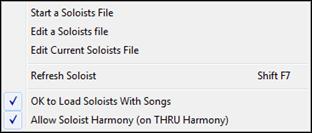
Start a Soloists File allows you to make and edit Soloist styles saved under the filename of your choice. See Soloist Edit dialog for additional details on importing/exporting/saving Soloists.
Edit a Soloists file opens an Open File dialog where you can select any Soloist file (*.SOL) to edit. To edit the soloist you are using, use the Edit Current Soloist File command.
If you want to make your own soloists or modify an existing Soloist, use the Soloist Maker (edit) module. The Soloist Maker allows you to define the parameters essential to a soloist’s playing, such as instrument range (i.e. tenor saxophone), extra legato playing, playing more on top of the beat, playing straighter 8th notes than usual swing 8th notes. In addition, you can set phrasing options, such as how long the phrase should be, and how much “space” to leave between phrases. You can also set how “outside” the playing should be.
Edit Current Soloists File opens the Select Soloist dialog with the currently installed Soloists file.
Refresh Soloist allows the Soloist full access to all solo ideas contained in its database. Use to refresh after several Soloists have been made.
OK to Load Soloists w/Songs
Enable this option if you want Soloists to be automatically loaded with a song that was saved with Soloist information.
Allow Soloist Harmony (on THRU Harmony)
Enable this option to permit the Soloist to utilize the Harmony features. This will allow the Soloist to make a harmonized solo with the harmony of your choice. See the Select Soloist dialog for additional details.
Sequencer Window for multi-Channel Soloist
There are two tracks in Band-in-a-Box to add your own recordings. These are the Melody and Soloist tracks. Normally you would want a single part on each of them. But, since MIDI information can have separate channels, it is possible to store 16 separate parts on each of the Melody and Soloist tracks. When the Melody or Soloist track has been set to “Multi (16)-Channel” we refer to this as “Sequencer Mode.” Selecting this command will then launch the Sequencer Window. Then you can customize which channels will play and display.
Edit Soloist Track is a submenu of editing options.
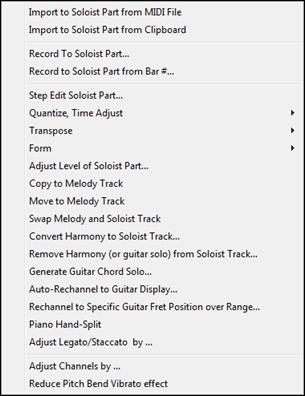
Import to Soloist Part from MIDI File allows you to import MIDI data from a file (*.MID) into the Soloist track.
Import to Soloist Part from Clipboard allows you to import MIDI data that has been pasted into the clipboard (e.g., from a sequencer such as PowerTracks).
Record to Soloist Part in the Soloist | Edit Soloist Track submenu records a MIDI part to the Soloist track instead of recording to the Melody track, so you can record a second Melody track.
Record to Soloist Part from… starts recording at the current location of the highlight cell after playing a 2-bar lead-in.
Step Edit Soloist allows you to enter/edit a soloist in step time from the Notation window. This uses an event list.
Quantize, Time Adjust
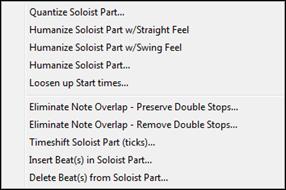
Quantize Soloist opens the Quantize Soloist Options dialog. The Humanize Soloist Part… feature is an advanced version of this function.
Humanize Soloist Part w/Straight Feel / Humanize Soloist Part w/Swing Feel Band-in-a-Box uses intelligent humanization routines, which can humanize a Soloist from one feel to another, from one tempo to another, and vary the amount of swing in 8th notes (but not randomly). The results are very musical, with natural sounding MIDI solos.
Humanize Soloist Part opens the Soloist: Quantize to New Tempo or Feel dialog. The humanize effect is broken down into 5 main categories: Tempo, Lateness, 8th Note Spacing, Legato, and Feel.
Loosen up Start times Loosen up Start Times is a dedicated function to vary the start times of notes on the Melody or Soloist tracks, with options for what notes to affect (harmony, chords, and amount of variance).
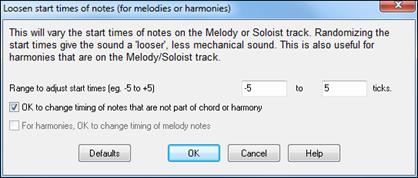
Eliminate Note Overlap – Preserve Double Stops / Eliminate Note Overlap – Remove Double Stops opens a Choose Range dialog to select the range of bars where note overlap will be eliminated while double stops are either preserved or eliminated.
Timeshift Soloist Part (ticks) allows you to move the Soloist forward or backwards in small increments relative to the rest of the song tracks. (Measured in ticks or parts per quarter, PPQ.)
Insert Beat(s) in Soloist Part allows you to insert a blank beat or beats into the song relative to the current time signature.
Delete Beat(s) from Soloist Part allows you to delete a beat or beats from the song relative to the current time signature.
Transpose shows a submenu with options for transposing the Soloist track.

Transpose Soloist Part allows you to transpose the Soloist track without affecting the other tracks in the song.
Transpose One Octave DOWN / Transpose One Octave UP transposes the Soloist part one octave in either direction. This is often useful if the Soloist instrument has been changed. Transposing can be done while the song plays.
Form
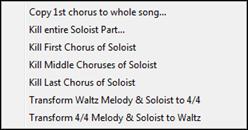
Copy 1st chorus to whole song stretches the Soloist track out over the entire song (i.e. first, last, and middle choruses).
Kill entire Soloist Part erases the Soloist track and any data that was contained therein.
Kill First Chorus / Kill Middle Choruses / Kill Last Chorus
These menu commands allow you to eliminate the Soloist from any chorus.
Transform Waltz Melody & Soloist to 4/4
If you have a song with a 3/4 time signature, you can instantly hear it as a 4/4 feel. Simply load the Waltz song and then change the style to a 4/4 style. Band-in-a-Box uses intelligent algorithms to transform the Soloist track to the new time signature.
Transform 4/4 Melody & Soloist to Waltz
You can automatically transform any 4/4 song to a Waltz 3/4 feel. Simply load in any 4/4 song and change the style to a Waltz style. The program will offer to transform the Soloist track so that it works as a Waltz. It’s fun and educational to hear and play familiar songs in a Waltz feel.
Adjust Level of Soloist Part allows you to increase or decrease the volume (velocity) of the Soloist track without affecting the other tracks.
Copy to Melody Track in the Soloist | Edit Soloist Track submenu copies the entire contents of the Soloist track to the Melody Track. This is useful for a temporary holding area for your soloist or for bouncing tracks.
Move to Melody Track copies the entire contents of the Soloist track and erases the original data from the Soloist track, preparing it for a new track or data.
Swap Melody and Soloist Track performs a “double copy/move” so that the data that was in the Soloist track gets transferred to the Melody track and vice versa. This is also known as track bouncing.
Convert Harmony to Soloist Track… converts a single line Soloist track to include the current harmony selection.
Remove Harmony (or guitar solo) from Soloist Track removes a harmony from a track, providing that the harmony was put there by Band-in-a-Box in the first place using the Convert Harmony to Soloist Track command.
Generate Guitar Chord Solo opens the Guitar feature dialog for generating a guitar chord solo.
Auto-Rechannel to Guitar Display converts channels on a track to channels 11 to 16. Channels 11 to 16 are used by Band-in-a-Box to indicate strings 1 to 6 of a guitar. It uses the current position marker on the guitar for this command. A popup question will ask if you want to include events that are already on the guitar channels.
Rechannel to Specific Guitar Fret Position over Range changes the fret position over the selected range.
Piano Hand-Split manually splits a piano part on a Melody or Soloist track using the intelligent hand-splitting routines. The left/right hands display in red/blue on the big piano, and on bass/treble clefs on the notation. Import a piano MIDI file to the Soloist track to get a split-hands display and printout.
Adjust Legato/Staccato by…
This allows you to increase legato of the Soloist track by N ticks, avoiding the next note by M ticks, or reduce the length of notes by N ticks, preserving a minimum of M ticks duration of notes. To increase legato of the notes, enter a positive number in the first dialog. The duration of notes in the track will be increased by this number of ticks. Then, in the next dialog, specify the number of ticks to avoid next note. To reduce the length of notes, enter a negative number in the first dialog. The duration of notes in the track will be decreased by this number of ticks. Then, in the next dialog, specify the minimum duration of notes.
Adjust Channels by will adjust all MIDI channels by the number value entered.
Scales shows a submenu with options for generating scales.
![]()
The menu items Generate Scales and Auto-Generate Scales when play pressed allow you to generate scales for a certain song or auto-generate them for all loaded songs. You can view the scales in the notation and the on-screen guitar and piano.
Audio Menu
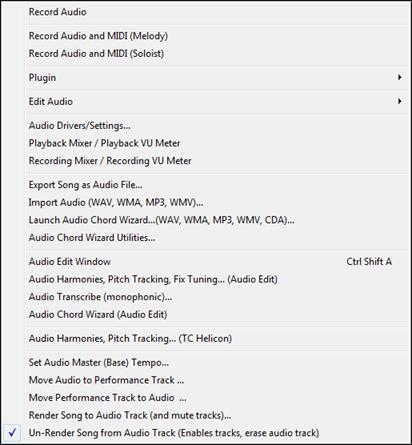
The Record Audio function is used to Record Audio using a microphone plugged into your sound card or a guitar (or mixer) plugged into the line-in on your sound card. This launches the Record Audio Dialog and the Record Audio – Keep Take dialog.
The next two items, Record Audio and MIDI (Melody) and Record Audio and MIDI (Soloist) refer to the situation where you want to simultaneously record an audio track (vocals etc.) as well as a MIDI piano part. You can record the MIDI to the Melody or Soloist track.
The Plugin menu command refers to running a plug-in audio effect. This applies an audio effect such as Reverb or Chorus to the already recorded audio part. Band-in-a-Box comes with a large selection of high quality audio effects built-in, such as Compressor, Gate, Distortion, Reverb, Echo, Chorus, Flanger, Ring Mod, Tremolo, Tone Control, Graphic EQ, Parametric EQ, Gain Change, De-Ess, Auto-Wah, Pitch Shift, Exciter, Enhancer and Hum Filter. DirectX plug-ins from PG Music and other makers are also supported. The plug-ins are fully documented in the online Help. |
|
Edit Audio shows a submenu with options for editing the Audio track.
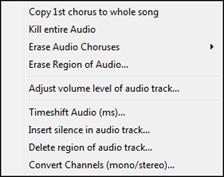
Copy 1st chorus to whole song copies the first chorus of audio to the rest of the song.
The Kill entire Audio menu item is used to erase the Audio Track.
Erase Audio Choruses will erase the First Chorus, Middle Choruses, or the Last Chorus as chosen from a list box.
Erase Region of Audio will erase a specified region of bars/beats of audio.
Adjust volume level of audio trackchanges the volume of the audio track itself. It uses a sophisticated peak-limiting algorithm to ensure that increases in the volume do not result in clipping of the sound, which would be heard as a loud distortion. It accepts units of decibels (dB). Zero means no change in the level, whereas +6 would be a doubling of the sound, and –6 halves the sound level.
Timeshift Audio (ms) is used to time shift the whole audio track a certain number of milliseconds. Normally you wouldn’t have to time shift a track at all. There are settings in the Audio-Options Dialog (see below) that can adjust for synchronization differences between your sound card and MIDI devices (for example, the VSC has a 430ms latency). But the time shift audio command can be useful in special cases.
Insert silence in audio track lets you insert silence of the specified length at the specified location. For example, if you decide to add an extra 2 bars to the intro in Band-in-a-Box, and you’ve already recorded an audio track, you should insert 2 bars (8 beats in a 4/4 time signature) into the audio track as well.
Delete region of audio track will delete a region of audio, eliminating the created gap.
Convert Channels (mono/stereo) allows you to convert the Audio track from stereo to mono, or vice versa. There is an option to choose the percentage of each channel.
Audio Drivers/Settings opens the Audio Settings dialog where you can select an audio driver (WAS, ASIO, or MME) or the settings.
Playback Mixer / Playback VU Meter takes you directly to the Windows® Playback control to adjust volumes on your sound card. Note that not all sound devices have VU meters.
Recording Mixer / Recording VU Meter takes you directly to the Windows® Recordingcontrol to adjust volumes on your sound card. Note that not all sound devices have VU meters.
Export Song as Audio File allows you to save the song as an audio file.
Import Audio (WAV, WMA, MP3, WMV) will open an audio file in WAV, MP3, Windows® Media Player, or CD Audio format.
Launch Audio Chord Wizard will open the Audio Chord Wizard to analyze chords in an existing Band-in-a-Box song (that has a WAV file on the audio track).
Audio Chord Wizard Utilities opens a dialog with handy options to:
- Make/remove tempo map in Band-in-a-Box.
- Remove audio file from song.
- Auto-set key signature, with button present in the Audio Chord Wizard.
- Enable/disable the Band-in-a-Box style.
Audio Edit Window launches the Audio Edit window where the wave file can be viewed and edited.
Audio Harmonies, Pitch Tracking, Fix Tuning (Audio Edit) opens the built-in Audio Harmony dialog, which allows you to harmonize the audio or correct out-of-tune notes.
Audio Transcribe (monophonic) transcribes the audio data to the Melody or Soloist track as MIDI data.
Audio Chord Wizard (Audio Edit) opens the Audio Edit window and allows you to use the built-in Audio Chord Wizard feature.
Audio Harmonies, Pitch Tracking (TC Helicon) opens the Generate Audio Harmonies dialog. There are three uses of the Audio Harmonies in Band-in-a-Box, namely:
- Pitch tracking (fixing) of the melody.
- Harmonizing your voice using Band-in-a-Box harmonies (when a MIDI melody is present).
- Harmonizing your voice to the chords of the song (when no MIDI melody is present).
Set Audio Master (Base) Tempo is used to ensure that tempo stretches are based on correct master tempo.
Move Audio to Performance Track copies the Audio track to a selected track as either a WAV or WMA file.
Move Performance Track to Audio renders the selected track (e.g. Melody) and moves it to the Audio track.
Render Song to Audio Tracks (and mute tracks)
Use this to render all tracks to the Audio track and mutes the MIDI tracks.
Un-Render Song from Audio Tracks (Enables tracks, erase audio track)
Use this to erase a rendered Audio track and restore MIDI playback.
Harmony Menu
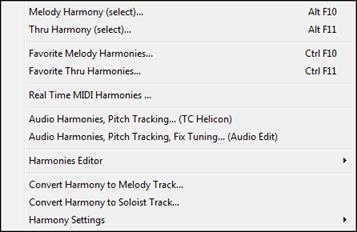
Melody Harmony (select)
This option brings up the complete Harmony styles list and allows you to choose one for the current Melody track.
Thru Harmony (select)
This option brings up the complete Harmony styles list and allows you to choose one for the current Thru track.
Favorite Melody Harmonies
This option brings up your favorite 50 Harmony styles (based on recent usage) and allows you to choose one to use on the Melody track.
Favorite Thru Harmonies
This option brings up your favorite 50 Harmony styles (based on recent usage) and allows you to choose oneto use on the Thru track.
Real Time Harmonies
This feature allows you to play harmonies in real time. Use this with your MIDI keyboard (while Band-in-a-Box is stopped). Hold a chord down with the left hand and play notes with the right hand. The notes will be harmonized according to the chord that you’re playing in the left hand.
Audio Harmonies, Pitch Tracking (TC Helicon)
You can apply a harmony to the audio track – allowing you to automatically create up to 4-part vocal harmonies from your singing. The Choir Effect can create up to sixteen voices.
Band-in-a-Box generates the harmonies using the world-leading TC-Helicon Vocal Technologies engine. Once you have recorded a vocal part into Band-in-a-Box, you can use this feature in many ways, including:
- Pitch tracking (fixing) of the melody.
- Harmonizing your voice using Band-in-a-Box harmonies (when a MIDI melody is present).
- Harmonizing your voice to the chords of the song (when no MIDI melody is present), including unison voices.
Audio Harmonies, Pitch Tracking, Fix Tuning (Audio Edit) opens the built-in Audio Harmony dialog, which allows you to harmonize the audio or correct out-of-tune notes.
Harmonies Editor shows a submenu with options for making or editing harmonies.

Start a New Harmonies File
This allows you to make and edit Harmony styles saved under your own filename.
Edit a Harmonies File
This allows you to edit a Harmony file that is in the C:\bb\Data directory.
Edit Current Harmonies File
This allows you to edit the Harmony file that is currently loaded on your system.
Convert Harmony to Melody Track
This converts a single line Melody track to include the current harmony selection, with options to convert the whole song or specify a range of bars, to eliminate note overlaps, and loosen note start times.
Convert Harmony to Soloist Track
This converts a single line Soloist track to include the current harmony selection (On the Thru harmony), with options to convert the whole song or specify a range of bars, to eliminate note overlaps, and loosen note start times.
Harmonies Settings shows a submenu with options for using harmonies.
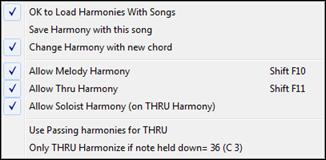
OK to Load Harmonies with Songs
Toggle this option “On” if you want to load any harmony settings that were saved/embedded in a given song.
Save Harmony with this song
Toggle this option “On” to allow Band-in-a-Box to embed the harmony settings for the current song so that they may be recalled automatically at a later time.
Change Harmony with new chord
Toggle this option “On” to allow the program to vary the harmony characteristics (i.e. inversions) each time a new chord is encountered in the song.
Allow Melody Harmony
Toggle this option “On” to allow harmonies on the Melody MIDI channels.
Allow Thru Harmony
Toggle this option “On” to allow harmonies on the Thru MIDI channels.
Allow Soloist Harmony (on THRU Harmony)
Toggle this option “On” to allow the Thru MIDI channels to utilize the harmony features for the Soloist track.
Use Passing Harmonies for THRU
When playing along on a MIDI keyboard (or the Wizard) using a Thru harmony, you can use passing harmonies. For example, on a C7 chord, with an Ab note, the harmony might be a B diminished chord, which is a passing harmony.
Only THRU Harmonize if note held down = 36 (C3)
By setting this option you can specify to only harmonize the note if a certain note is held down. (The default note is a C two octaves below middle C.)
Window Menu
The Window menu launches various windows in Band-in-a-Box.
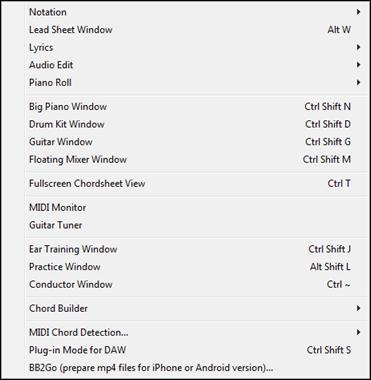
Notation opens a submenu with options for Notation display for your song.
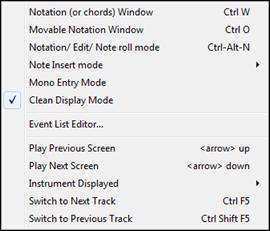
Notation (or Chord) Window toggles between the notation and the chord sheet views.
Movable Notation Window opens a movable and resizable notation window.
Notation/Edit/Note roll mode moves the notation window through its various entry modes.
Note Insert mode
Toggling this to “on” allows you to insert notes graphically with your mouse or keyboard on the notation window.
Mono Entry Mode
Toggle this “on” if you are inserting single notes (not chords) on the notation window.
Clean Display Mode
Toggle this “on” if you want notes displayed on your notation window in a quantized view (does not affect song playback).
Event List Editor
This opens the Event List window. You can edit events including all MIDI events and lyric events using the Event List Editor. You can edit the Melody, Soloist, Lyrics, or StyleMaker patterns using this event list. The information in the Event List is color coded by channels for multi-channel Melody and Soloist tracks.
The event list can also be launched from the Notation window by pressing the event list button (#).
Play Previous Screen backs the song up four bars.
Play Next Screen moves the song to the next four bars.
Instrument Displayed
Since there is not enough room on the screen to display the notation for all instruments, only one is displayed at a time. You can choose which one you want to display from this menu option or with the instrument buttons on the Notation window.
Switch to Next Track / Switch to Previous Track
Select parts from left to right in the Instrument row buttons.
Lead Sheet Window launches the lead sheet notation.
Lyrics shows a submenu with options to open lyrics windows or Vocal Wizard.

Big Lyrics Window launches a window that displays lyrics in a Karaoke format.
Lyric Document Window displays a full screen of formatted lyrics. You can easily copy and paste lyrics to and from your favorite word processor. The lyrics will also display in the Big Lyrics window.
Show Karaoke Window and load Karaoke MP3/CDGfiles to see scrolling Karaoke lyrics in the CDG window.
Vocal Wizard selects and transposes the song to the best key for the singer’s vocal range.
Audio Edit shows a submenu with options to open two types of windows.
![]()
Audio Edit Window allows you to edit audio data, using copy, cut, and paste. You can zoom the audio in to the sample level so that you can see the actual sine waves present.
Moveable Audio Edit Window opens the regular Audio Edit window but lets you reposition it on the screen.
Piano Roll shows a submenu with options to open two types of windows.
![]()
Piano Roll Window launches the Piano Roll window where you can edit the Melody or Soloist track in a traditional piano roll format.
Moveable Piano Roll Window opens the regular Piano Roll window, but lets you move and reposition it on the screen.
Big Piano Window launches a window that displays a Big Piano.
Drum Kit Window launches the animated Drum Kit.
Guitar Window launches an on-screen Guitar.
Floating Mixer Window opens or closes the “always on top” mixer to quickly set volumes, panning, reverb, tone and patches.
Fullscreen Chord Sheet View displays Notation screen or Chord Sheet in full screen mode.
The MIDI Monitor and Guitar Tuner items launch the selected module. Each one has extensive help available inside the module. There are also buttons available for these items.
Ear Training Window
You can practice your ear training with help from Band-in-a-Box. In addition to the common interval exercises (perfect 4th, minor 2nd, etc.), learning to play-by-ear for Jazz and Pop music is further enhanced by ear training exercises to recognize common chord types (e.g., Major, Minor, Dominant, etc.)
You will also see buttons that launch musical games for fun while you train your ear. [Pitch Invasion] helps to develop perfect pitch as you shoot down “alien” notes invading from above (you hear the note sound, and click on the on-screen Piano, MIDI or QWERTY to shoot them down). [Music Replay] develops your pitch, rhythm, and melody recognition by replaying what the program plays in note, rhythm, or melodic modes.
Practice Window allows convenient 1-click access to many Band-in-a-Box features that help you with practicing. These include the Ear Training dialog, games (Pitch Invasion etc.), Metronome, CopyMe, Sight Reading, 101 Riffs series, and more.
Conductor Window
As the song is playing, many “single key” hot keys are available to control the playback and looping of the song. For example, pressing the “4” key will ensure that the middle chorus is the next one played, and pressing the “S” key will ensure that the middle section is looped. This would be useful to extend a song that has the last chorus playing. Custom loop points can also be set for each song.
These settings are ideal for live performance, or “jam sessions” where you aren’t entering new Band-in-a-Box songs but want full control of the playback. These loops happen seamlessly at the end of the chorus, so are suitable for the “dance floor.” In addition, you can control Band-in-a-Box from a standard MIDI keyboard, pressing MIDI keys corresponds to program functions. For example, load the next song, play/pause/tempo adjust/change thru patch/jump to middle choruses/open the notation or lead sheet window – all from your MIDI keyboard!
Chord Builder
![]()
Chord Builder allows you to build up chords using mouse clicks.
Play Current Chord
This function plays the current chord on the Chord Sheet. It is most commonly accessed by pressing Shift+Enter on the Chord Sheet.
MIDI Chord Detection
This Window menu command brings up a submenu for entering chords from a keyboard.

Select MIDI Chord Detection… and play any chord on your MIDI keyboard. Band-in-a-Box will then provide you with up to 4 interpretations of the chord you played, with its best suggestion at the top and alternates below.
Plug-in Mode for DAW puts Band-in-a-Box into plug-in mode, open as a small always-on-top window that acts as a plug-in for your favorite DAW/sequencer so that you can drag-and-drop MIDI and audio (WAV) tracks from BB to your favorite sequencer.
The DAW Plug-in mode is a mode within the regular Band-in-a-Box program. This mode allows you to transfer tracks, or parts of tracks, to other DAW Sequencers easily, by simply dragging the track icons from Band-in-a-Box (BB) to the tracks window of your DAW.
BB2Go (prepare mp4 files for iPhone or Android version)
Band-in-a-Box for iPhone (BB iPhone) is an app for iOS devices including iPhone®, iPad®, and iPod Touch®. The BB iPhone version is meant to function as a client to the regular Band-in-a-Box desktop version. The BB iPhone app is available separately from the Apple® App Store, http://www.apple.com/iphone/apps-for-iphone/ .
The iPhone version of Band-in-a-Box will see the “BB2Go” folder (C:\bb\BB2Go). Any Band-in-a-Box songs that you put in this folder are visible to the BB iPhone. You can send files back and forth from BB iPhone to Band-in-a-Box for Windows®>, and the files go to the BB2Go folder.
You can add audio to the Band-in-a-Box files in the BB2Go folder from the Band-in-a-Box Windows menu with the BB2Go command and select the files that you want to have MP4/M4A audio added. You can also generate the audio from the iPhone version.
Help Menu
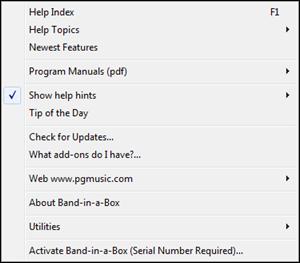
Help Index lists all of the Help topics. Type in a keyword under the “Index” tab to go to the topic you want.
Help Topics shows a submenu with options to open help topics.
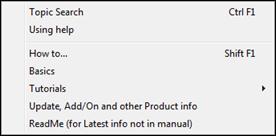
Topic Search opens the Help file where you can search the Table of Contents or the Index or use the Search feature to find your topic.
Using help has Windows® tips for using Help files.
How to…opens a categorized list of topics. It’s a fast way to find out about a particular feature or operation.
Basics goes directly to the “Basics” introduction to Band-in-a-Box.
Tutorials shows submenus with options to open detailed, step-by-step instructions for Band-in-a-Box.
Update, Add/On and other Product info
Other Band-in-a-Box add-ons, PG Music Inc. products, and contact information.
ReadMe (for Latest info not in manual) documents the latest features, plus an archive of earlier updates.
Newest Features describes the new features in the current version.
Program Manuals (pdf) has a submenu with options for opening the program manuals.
![]()
Display Program Manual
This opens a .pdf file of the full Band-in-a-Box manual in Acrobat Reader. Follow the bookmarks to find specific topics.
Display Program UPGRADE Manual
This will open a .pdf of the upgrade manual for this particular version of Band-in-a-Box, which may include new documentation not yet added to the full manual. The upgrade manual is often a more convenient way to reference the new features in Band-in-a-Box without looking through the full manual.
Show help hints
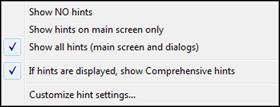
Band-in-a-Box has comprehensive fly-by hints that appear when you move over an item. These include hints for the dialog boxes and various windows. You can set the hints to display none, basic, or detailed information.
Tip of the Day
Power user tips. This feature can be set to run automatically when Band-in-a-Box opens. If you want to add your own tips, you can edit the BBW.TIP file. Just put a tip on a single line (no carriage return till the end of the tip). Tips are limited to 255 characters per tip. Band-in-a-Box automatically compiles the BBW.TIP file at startup of the program to a binary file called BBW.TPB.
Check for Updates
User can check/download/pause/continue/install for a newer version (not free), newer build (free), and updated RealTracks files (free).
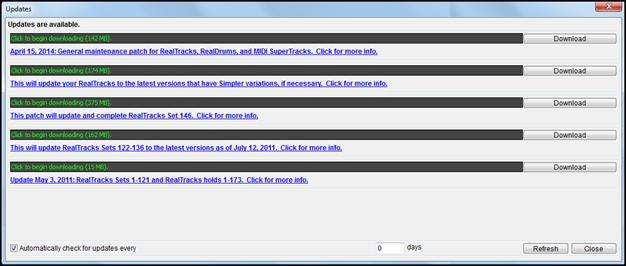
![]() You can set whether you want any checking for updates at boot up to be done, and if so, how often. (Note: A setting of 0 days will check every time you run the program.)
You can set whether you want any checking for updates at boot up to be done, and if so, how often. (Note: A setting of 0 days will check every time you run the program.)
You can also press the [Refresh] button to check for a major or minor upgrade of the program and RealTracks patches. Download free updates within this dialog when available.
What add-ons do I have?
One of the greatest strengths of Band-in-a-Box is the ability to add-on and enhance the program through add-on Styles, Soloist, and Melodist disks. The “What Add-ons” feature in the Help menu scans your computer’s Band-in-a-Box directory and displays what add-ons are and aren’t found. To see the latest add-ons, click on the [www.pgmusic.com/addons.htm] button to go directly to the add-ons page on the PG Music Inc. web site.
Web www.pgmusic.com
Links to some important pages on the PG Music Inc. web site. Selecting one of these topics will automatically launch your Web Browser, and direct you to the PG Music web site.
About Band-in-a-Box launches a dialog with key information such as the version number you are running and computer system information.
Utilities
Display Log Text file of Yellow/Green Messages
The Yellow/Green messages and date/time are saved in a file called C:\bb\Data\Logs\FlashMessageLog.txt. You can open this file inside the program at any time by choosing this menu command.
Install Coyote WaveTable Synth runs the setup program for the Coyote WT 1.0 software synthesizer. This soft synth is compatible with 64-bit operating systems including Windows® Vista, 7, 8, 8.1 and 10.
Activate Band-in-a-Box (Serial Number Required) allows you to activate Band-in-a-Box if you haven’t done so yet. Band-in-a-Box needs to be activated within 30 days after you first run Band-in-a-Box.
Special Options for Activation/De-Activation will show options to change the activation status (e.g. removing activation and moving it to another PC).
Write BandInABoxRequest file creates a file that you can email to support@pgmusic.com if you have a problem activating the program.
Run Cleanup routine
The Band-in-a-Box folder (usually C:\bb) has become full of lots of files over the years. Up to 10,000 files are present in the folder on a full install of the UltraPAK. This menu command will run a utility app C:\bb\Data\BB_cleanup.exe, which will unclutter the folder and move files to various subfolders. (Note: This utility will run automatically during the Band-in-a-Box program installation, so normally you don’t need to run this manually.)
Run Download/Install Manager now
The Download Manager automatically downloads and installs all of the Band-in-a-Box content (mainly RealTracks files) in background. It is located in the C:\bb\Data\DownloadManager folder and can be launched from inside the program with this menu command.
Activate Band-in-a-Box (Serial Number Required) allows you to activate Band-in-a-Box if you haven’t done so yet. Band-in-a-Box needs to be activated within 30 days after you first run Band-in-a-Box.
Shortcuts: Keystroke Commands - Hot Keys
Quick Song Settings
Typing special words, instead of chord names, will make the following settings:
begin + Enter |
Sets the beginning of the chorus to the current bar |
chorusend + Enter |
Sets the end of the chorus to the current bar |
end + Enter |
Sets the end of the song to the current bar |
tkc + Enter |
Sets key signature to c, tkbb would set it to bb |
trc + Enter |
Transposes song to key of C |
t125 + Enter |
Sets tempo to 125 |
S + Enter |
Launches the StylePicker window |
Quick-Load Songs and Styles
You can quick-load a song by typing only. In chord entry mode (Chord Sheet or Notation window) type the word “song” followed by a file name or partial file name + Enter and the song will get loaded if it is in the current folder. Typing “bossa” would load in the first song with bossa in the name AFTER the current song name in the current folder.
To change to another folder, type “song” followed by the full path and file name. For example, type song and then C:\bb\zzjazz.mg1+Enter to load in that exact song name.
Quick-load a style by typing “style” followed by a style name, e.g., stylezzbossa+Enter loads in zzbossa.sty.
Keystroke Commands
It’s often faster to use keystrokes instead of using the mouse. For example, there are keystroke “hot keys” to mute instruments or to adjust volume, panning, reverb, chorus, or bank of instruments.
Muting Parts
Alt+3 |
Mutes the Bass |
Alt+4 |
Mutes the Piano |
Alt+5 |
Mutes the Drums |
Alt+6 |
Mutes the Guitar |
Alt+7 |
Mutes the Strings |
Alt+8 |
Mutes the Melody |
Alt+9 |
Mutes the Soloist |
Selecting Parts
Ctrl+3 |
Selects the Bass |
Ctrl+4 |
Selects the Piano |
Ctrl+5 |
Selects the Drums |
Ctrl+6 |
Selects the Guitar |
Ctrl+7 |
Selects the Strings |
Ctrl+8 |
Selects the Melody |
Ctrl+9 |
Selects the Soloist |
Instrument Part Settings
Hold down Ctrl+Shift and the letter to change these instrument settings.
Q,W |
Decrease/Increase Volume |
E,R |
Decrease/Increase Panning |
T,Y |
Decrease/Increase Reverb |
U,I |
Decrease/Increase Chorus |
O,P |
Decrease/Increase Bank |
Use Ctrl+Shift together with the 1-9 and 0 keys on the keyboard to select Favorite Instruments. For example, let’s change the Piano part to Electric Piano 1.
- Press Ctrl+4 to select the Piano part.
- Press Ctrl+Shift+2 to select the Favorite #2. That is Electric Piano 1.
Use Ctrl+Shift and the [-] and [=] keys to decrease/increase the patch by 1.
Volume Settings
Ctrl+Alt+Shift+R |
Set current part’s volume. |
Ctrl+Alt+A |
Decrease master volume by 5. |
Ctrl+Alt+S |
Increase master volume by 5. |
Ctrl+Alt+D |
Set master volume. |
Ctrl+Alt+Shift Q |
Reduce all part volumes by 5. |
Ctrl+Alt+Shift W |
Increase all part volumes by 5. |
Ctrl+Alt+Shift E |
Set all part volumes. |
Looping / Song Navigation Keystrokes
NUMPAD 1 |
Toggle looping on/off. |
NUMPAD 2 |
Open Loop Section Settings dialog. |
Ctrl+NUMPAD 1 |
Play with last chorus looped. |
Ctrl+NUMPAD 2 |
Play with middle choruses looped. |
Ctrl+NUMPAD 3 |
Play with middle and last choruses looped. |
Ctrl+NUMPAD 4 |
Jump to last chorus. |
Ctrl+NUMPAD 5 |
Jump to ending. |
Ctrl+NUMPAD 7 |
Loop Notation screen. |
NUMPAD [DEL] |
Advances the notation, lead sheet, and guitar window by one chord (group of notes). |
NUMPAD [INS] |
Backs up the notation, lead sheet, and guitar window by one chord. |
Transpose Settings
Ctrl+Alt+1 |
Transpose Melody down one octave |
Ctrl+Alt+2 |
Transpose Melody up one octave |
Ctrl+Alt+3 |
Transpose Soloist down one octave |
Ctrl+Alt+4 |
Transpose Soloist up one octave |
Ctrl+Alt+5 |
Transpose down 1 semitone. |
Ctrl+Alt+6 |
Transpose up 1 semitone. |
Ctrl+Alt+7 |
Transpose setting dialog. |
Custom File Open Dialog
Ctrl+Shift+F3 |
Load song with custom file dialog. |
Alt+F |
In custom file dialog - Favorite Folders. |
Alt+N |
In custom file dialog - Font selection. |
Alt+S |
In custom file dialog - Search dialog. |
Windows
Ctrl+W |
Toggle Notation and Chord Sheet windows. |
Ctrl+O |
Movable Notation window. |
Alt+W |
Lead Sheet window. |
Ctrl+T |
Display Notation screen or Chord Sheet in full screen. |
Ctrl+~ |
Conductor window. |
Ctrl+Shift+A |
Audio Edit window. |
Ctrl+Shift+D |
Drum Kit window. |
Ctrl+Shift+G |
Guitar window. |
Ctrl+Shift+J |
Ear training window. |
Ctrl+Shift+L |
Big Lyrics window. |
Ctrl+Shift+M |
Mixer Window |
Ctrl+Shift+N |
Big Piano window. |
Ctrl+Shift+S |
Plug-in mode for DAW. |
Alt+Shift+L |
Practice window. |
Ctrl+Alt+Shift+L |
Lyric Document window. |
StyleMaker Hot Keys
F1, Shift+F1, Ctrl+F1 |
Help |
F2 |
Save style |
Alt+F2 |
Save style as ... |
R or F3 |
Record pattern |
<Spacebar> or F4 |
Play pattern |
F8 |
Play pattern on chord |
F10 |
Edit pattern options |
F6 or Shift+F6 |
Change instrument |
Cursor Keys |
Move around screen |
Alt+F4 |
Quit the StyleMaker |
StyleMaker Drum Screen Hot Keys
F5 |
Drum alternate notes |
Bottom row (ZXCVBNM,. /) |
Drum note entry |
F6 |
Time base |
F10 or Alt+F4 |
Exit |
Additional Keystrokes
There are additional keystrokes available, listed on the pulldown menus beside the function. Hot keys may access any function on the pull-down menu by pressing the Alt key and the first letter of the Menu followed by the underlined letter of the command. For example, Alt+F+O would access File | Open.
Playing songs. |
Spacebar twice or F4 |
Stopping songs. |
Spacebar or Esc |
Help. |
F1 |
Help – Topic Search. |
Ctrl+F1 |
Help – How To. |
Shift+F1 |
Record (melody or pattern). |
Ctrl+R |
Record from any bar. |
Ctrl+Alt+R |
Jukebox start/stop. |
F8 |
Save song. |
F2 |
Save song with patches. |
Alt+F2 |
Load song. |
F3 |
Load song using favorite song list. |
Shift+F3 |
Load song using titles window. |
Ctrl+F3 |
Load songs with melodies. |
Alt+F3 |
Load song with standard long file dialog. |
Alt+Shift+F3 |
Load next file (alphabetically by file name). |
Shift+F8 |
Load previous (alphabetically by file name). |
Ctrl+Shift+F8 |
Load next style (in alphabetical order). |
Alt+Shift+F8 |
Load previous style (in alphabetical order). |
Ctrl+Alt+Shift+F8 |
Open MIDI file. |
F7 |
Choose a user style. |
F9 |
Notation – switch to next track |
Ctrl+F5 |
Notation – switch to previous track |
Ctrl+Shift+F5 |
Open StylePicker. |
Ctrl+F9 or S+Enter |
Select favorite styles. |
Shift+F9 |
Edit user style. |
Alt+F9 |
Edit current style. |
Ctrl+Shift+F9 |
Refresh Melodist or Soloist |
Shift+F7 |
Select Melody Harmony |
Alt+F10 |
Favorite Melody Harmonies |
Ctrl+F10 |
Allow Melody Harmony |
Shift+F10 |
Select Thru Harmony |
Alt+F11 |
Favorite Thru Harmonies |
Ctrl+F11 |
Allow Thru Harmony |
Shift+F11 |
Turn song Embellisher on/off. |
Ctrl+Alt+E |
Import chords from MIDI file. |
Ctrl+Alt+I |
Send GM mode on message. |
Ctrl+Alt+Q |
Set tempo. |
Ctrl+Alt+T |
Open the Preferences dialog. |
Ctrl+E |
Open the Song Settings dialog. |
Ctrl+N |
Launch Chord Builder. |
Ctrl+Shift+B |
Enable/Disable RealDrums |
Ctrl+Shift+F6 |
Edit current bar options. |
F5 |
Save MIDI file. |
F6 |
Quit the program. |
Alt+F4 |
Chord List
Commonly used chords are displayed here in bold type.
Major Chords
C, Cmaj, C6, Cmaj7, Cmaj9, Cmaj13, C69, Cmaj7#5, C5b, Caug, C+, Cmaj9#11, Cmaj13#11
Minor Chords
Cm, Cm6, Cm7, Cm9, Cm11, Cm13, Cmaug, Cm#5, CmMaj7
Half Diminished Chords
Cm7b5,
Diminished Chords
Cdim
Dominant 7th Chords
C7, 7+, C9+, C13+, C13, C7b13, C7#11, C13#11, C7#11b13, C9,
C9b13, C9#11, C13#11, C9#11b13, C7b9, C13b9, C7b9b13, C7b9#11,
C13b9#11, C7b9#11b13, C7#9, C13#9, C7#9b13, C9#11, C13#9#11, C7#9#11b13
C7b5, C13b5, C7b5b13, C9b5, C9b5b13, C7b5b9, C13b5b9, C7b5b9b13,
C7b5#9, C13b5#9, C7b5#9b13, C7#5, C13#5, C7#5#11, C13#5#11, C9#5,
C9#5#11, C7#5b9, C13#5b9, C7#5b9#11, C13#5b9#11, C7#5#9, C13#5#9#11,
C7#5#9#11, C13#5#9#11
Suspended 4 Chords
Csus, C7sus, C9sus,
C13sus, C7susb13, C7sus#11, C13sus#11, C7sus#11b13, C9susb13, C9sus#11, C13sus#11, C9sus#11b13, C7susb9, C13susb9, C7susb9b13, C7susb9#11,
C13susb9#11, C7susb9#11b13, C7sus#9, C13sus#9, C7sus#9b13, C9sus#11, C13sus#9#11, C7sus#9#11b13,
C7susb5, C13susb5, C7susb5b13, C9susb5, C9susb5b13, C7susb5b9,
C13susb5b9, C7susb5b9b13, C7susb5#9, C13susb5#9, C7susb5#9b13,
C7sus#5, C13sus#5, C7sus#5#11, C13sus#5#11, C9sus#5, C9sus#5#11, C7sus#5b9, C13sus#5b9, C7sus#5b9#11, C13sus#5b9#11, C7sus#5#9, C13sus#5#9#11, C7sus#5#9#11, C13sus#5#9#11,
It is not necessary to type upper or lower case. The program will sort this out for you.
Any chord may be entered with an alternate root (“Slash Chord”) e.g.: C7/E = C7 with E bass.
Separate chords with commas to enter 2 chords in a 2-beat cell, e.g., Dm,G7
Tricky Chords
C5b This is “C flat 5.” It is spelled this way to avoid confusion.
C2, C5, C4, C69, C7alt, Cm7#5
You can type C-7 for Cm7 (i.e. use the minus sign) or C7-9 for C7b9.
Shortcut Chords
If you enter a lot of songs, you will appreciate these shortcut keys.
J = Maj7
H = m7b5 (H stands for Half diminished)
D = dim
S = 7sus
Add your own chord shortcuts.
Have you found a chord that Band-in-a-Box doesn’t recognize? If so, add it to your chord shortcuts file, and Band-in-a-Box will allow you to type in that chord in the future. This also lets you define chord “shortcuts,” one-letter abbreviations for longer chord names (“J” for “Maj7” etc.). If you find a chord that Band-in-a-Box won’t accept like Csus2, when it expects C2 instead you can enter this on a single line (without the quotes) “Csus2@C2.” Then Band-in-a-Box will enter the chord C2 if you type in Csus 2.
The text file C:\bb\Data\Shortcut.txt allows you to add new chord shortcuts. Note that this file doesn’t ship with Band-in-a-Box (or it would overwrite your file!). The file C:\bb\Data\pgshortc.txt for shortcuts supplied by PG Music. You can add your own shortcuts in a text file you make yourself and name C:\bb\Data\shortcut.txt.
Unconditional 30-Day Money Back Guarantee on all PG Music products purchased from PG Music Inc.
PG Music Inc.
29 Cadillac Ave Victoria BC Canada V8Z 1T3
Sales: 800-268-6272, 250-475-2874,+ 800-4746-8742*
* Outside USA & Canada where International Freephone service is available.
Access Codes
Tech Support: Live Chat, support@pgmusic.com
 Online now
Need Help?
Customer Sales & Support
|
Phones (Pacific Time) 1-800-268-6272 1-250-475-2874 |
||
| Live Chat | ||
| OPEN | Online Ordering 24/7 |
|
| OPEN | Forums, email, web support |

